Marketing de Halo Wars/Official Halo Wars Community Site
Cette page est une transcription partielle de l'Official Halo Wars Community Site anciennement hébergé à l'adresse http://www.halowars.com.
Game Info[modifier | modifier le wikicode]
Overview[modifier | modifier le wikicode]
-"If they want war, we'll give 'em war."
The Game
Halo Wars is a real-time action strategy game for the Xbox 360 that allows the player to control large armies and to shrewdly direct them in realistic warfare. Set early in the iconic war between the Covenant and UNSC - made famous by the Halo FPS games - Halo Wars provides a new angle on the war while bringing new heroes to the battle.
In Halo Wars fans will be able to control armies of units that are familiar to them from the FPS games, such as UNSC Marines, Scorpion Tanks, and the iconic Warthog. Our E3 demo video gives a narrated first look at the game, and you can download it from our movies page.
The Controls
We've spent a great deal of time simply on getting the controls right. Halo Wars was created for the Xbox 360 from the ground up, which meant we didn't have to make compromises or shoe-horn in artifacts from a Windows PC game. We were able to take all the best aspects of RTS games, make them work perfectly on the Xbox 360, and exclude the rest.
The Developer
Halo Wars was developed by Ensemble Studios in Dallas, Texas. They were the developers behind the award winning Age of Empires series of real-time strategy games.
Halo Wars was released around the world on March 3rd, 2009. Please visit our FAQ page for answers to common questions.
Skirmish Maps[modifier | modifier le wikicode]
Here you'll find information about all of Halo Wars' Skirmish Maps. If the thumbnail is clickable, it will take you to a page about that map.
On each page you'll find snippets about the map from designers and artists, as well as much larger images of the maps, and a Y-Axis shot allowing you to plan avenues of attack.
If a thumbnail isn't clickable yet, check back in the future, as we'll be rolling them out as time goes by.
3v3 Maps[modifier | modifier le wikicode]
-
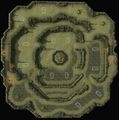
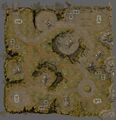
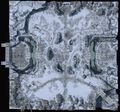
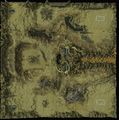
Exile
-
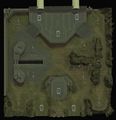
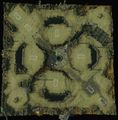
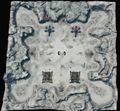
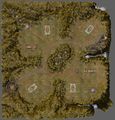
Fort Deen
-
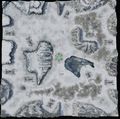
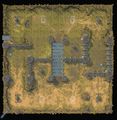
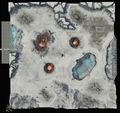
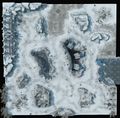
Frozen Valley
-
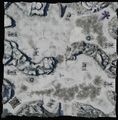
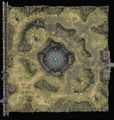
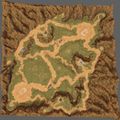
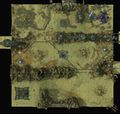
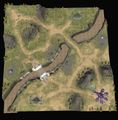
Glacial Ravine
Exile 3v3[modifier | modifier le wikicode]
Artist Notes
Paul Slusser, an Artist who worked on Exile tells us a bit about his work on the map.
Exile was one of the maps we created toward the end of the development cycle, so we pretty much knew going into it what kind of things to avoid.Since 3v3 maps are our worst performance maps, due to the amount of units it could have on screen at any given time, we knew this maps had to be pretty simplistic. Minimal use of terrain objects/vegetation and no water/lava, which actually worked out nicely since the setting was to represent a lifeless, dried up planet. One of the hardest parts of creating Exile had to be alignment of the terrain to the bordering Forerunner structure along the outer edges. I had originally planned on using a very large masking technique to handle this, but after a few attempts I realized that was not going to work for something that needed this type of pixel perfect alignment. So I had to slowly sculpt and blend the terrain by hand all the way around one of our largest maps. My favorite tactic on this map was to gain control over the free reactors and always get my team to hit the player on the outer most ring first. I found that the players that got placed in the middle where always planning for incoming attacks and would hesitate sending their forces away from their base to support allies.
Designer Notes
Justin Rouse, a skirmish map Designer, gives us one of his tactics:
Tactics: On exile I tend to let my start placement dictate my strategy more so than other maps. If I’m the center start position I like to rush hard and force the opposing center start player to call for help, keeping his teammates from doing what they want. If I’m either of the other two start locations I tend to go for an all out boom to tech’d up air units hoping our center position teammate can hold out while I try to get there.
Exile was originally called “Bowl_3_SWE” during the majority of development, so I always have to think twice what people are talking about when they say Exile.
Fort Deen - 3v3[modifier | modifier le wikicode]
Designer Notes
Fort Deen went through some iterations on gameplay because we wanted this map to feel like each player was pretty safe from the rush. Originally we only had one player per team start in the elevated “safer” areas with his two teammates starting on the outskirts. With the long distance from one side to the other on this map it was still easy enough for two players on one team to rush down the side of the map and hit the edge player with enough time to do serious damage before the edge player’s teammates could react and send help, very much like Frozen Valley and we wanted something different. The simple change of moving the starting locations for all three players up the ledge really helped achieve this. To reinforce this goal we put wall hooks and creep groups down the side paths to help hinder the early rush.
Justin Rouse, Multiplayer Map Designer, gives us one of his tactics:
Tactics: On this map I love to use Brute commando squads. Since they’re infantry I can put them into the wall towers and block off my enemies ground forces but because of my brute jump packs I can jump back and forth over the walls to get away from danger or to closer to juicy targets coming to shoot my units out of the towers. Once my team has the upper hand it can still be very difficult to crack the enemy team’s starting base location since they’re in close proximity to each other up on the ledges. While the enemy has their forces at one of the two choke points trying to stop my teammates tank/air combo and my brute chief from storming in, I like to walk my army of brute commandos up to the front wall in the center, where they usually only have missile towers for air to come over, and jumppack my brutes into the back of their base. When they figure out what I’m doing and send some troops over to stop me I jump my brutes back down and run away and repeat the process once they move back to the front.
Frozen Valley 3v3[modifier | modifier le wikicode]
Designer Notes
Justin Rouse, a skirmish map designer, dishes out some info on Frozen Valley: Frozen Valley was the first 3v3 map designed during the development of Halo Wars. After Chasms, this was probably our most played map through internal playtesting. The layout went through one major tweak throughout development and that was the opening down between the teams that runs along the bottom edge on picture shown here. The first iteration had the hole as well as the mount near that bottom edge of the map extend all the way to the edge. Leaving a pocket only access through the middle by land units. It allowed the two bottom player on each team to build up safely.
As map “hooks” came online I wanted them to be easily attacked from different angles and only having 2 paths between teams was making this too difficult. Once the bottom side path was opened leaving a “3-way” go between the teams, along with the hooks placed on the map, more strategic options became available and the map became extremely fun. Before, it was just a fairly straight forward map.
Designer Notes
Duncan Stanley, Community Manger for Robot, talks about Frozen Valley:
Frozen Valley was actually one of my least played maps during development. When it came to playtesting, I was usually available for the 1v1 and 2v2 playtest sessions (where I'd throw down with Thunder), so I rarely got to play Frozen Valley. Nonetheless, my incessant whining about the OPness of the Warthog got it toned down (yes, you read that right) before launch. Warthogs during development were almost immune to infantry up until RPGs entered the equation.
But on to Tactics! Your strategy for the game usually depends on if you're in the pocket (the middle) of your side or not. If you are, it's usually safe for you to boom and go for higher-tech units, possible swooping in to save the day at the last minute. If you're on either of the sides, you're usually in the thick of it with your opponents across the way fairly quickly over the expansions. As always, trying to grab your opponents nearest base is a good tactic to throwing their game off, if a bit risky.
Also, all the extra bases around the map mean that if you can protect them, you can get a ton of resources and build up armies very quickly. Personally, I like to go air if I'm Anders, or Tanks if I'm Forge on this map, they seem to cover the distance very quickly and can usually survive long enough for you to accomplish your goals with them.
Glacial Ravine 3v3[modifier | modifier le wikicode]
Designer Notes
Justin Rouse, a skirmish map Designer, talks about Glacial Ravine
Originally, our DLC2 pack (Historic Battles) was intended to contain only 3 maps: Barrens, Blood River, and Memorial Basin. After seeing the outcry for more 3v3 maps we took a look at what it would take to get one into the Pack. We did some due diligence and realized we didn’t have the time to create a new 3v3 from scratch, get it through testing, and put it into the map pack. So we compromised by repurposing an existing map, which allowed us to reduce developer time enough to get Glacial Ravine out the door with the others. We decided on using Frozen Valley as our base map because the majority of the bases were on the outer edge of the map which left us with a lot of central area to manipulate for game play rather than worrying about meeting our base requirement needs. Since this map was very open, and all of our 3v3’s had multi routes to the enemy we decided to go with a more focused front and funnel everyone through the middle. Adding in the wall towers allows players to control the “line” between them and their enemies easier than any of the other 3v3’s. With large scale battles happing in 1 place, this seemed like a perfect map to add the Sentinel Factory to giving everyone access to the Super Sentinel to be a stunning menace to large armies moving through the middle pass. There is only 1 free floating base location on each side of the map now so teams will have to strategize for which player gets the extra/3rd base location, also making the creeps at this location a bit tougher slows players from taking it just a tad.
Multiplayer Tactics
Tactics: On Glacial Ravine I like to use the Covenant and take advantage of the Scarab walking over cliffs and surprising the enemy with beams of death raining down from the hillside. Obviously, you can use any leader here but I prefer the Brute Chieftain for his Brute commandos. Using his brute commandos built from bases themselves allows me to use my building sockets to boom and get shield protection from air attacks. They also give me an infantry unit which I can use to garrison in the wall towers and hold the middle of the map for my team. If the other team takes control of the center wall towers upgrading the commandos to have jump packs allows me to move my forces over their walls and harass them while hopefully being able to jump back over to safety when they start to hunt my forces down. If my teammates haven’t crushed the enemy by this time I’m usually ready to get out an early Scarab. I usually don’t have much to support him but walking him over the center cliffs to surprise the enemy is very effective. Usually the entire enemy team scrambles to deal with my Scarab my teammates have free reign to attack other key locations.
2v2 Maps[modifier | modifier le wikicode]
-
Beasley's Plateau
-
Crevice
-
The Docks
-
Labyrinth
-
Repository
-
Terminal Moraine
-
Memorial Basin
Beasley's Plateau 2v2[modifier | modifier le wikicode]
Programmer Notes
Chris Stark, Programmer on Halo Wars, talks about his strategies on Beasley's Plateau.
Beasley’s Plateau is probably one of my favorite 2v2 maps. The wide open space gives me plenty of room to maneuver and sneak my army up next to the enemy base before they realize I’m coming. One of my favorite tricks on Beasley’s is to use my scout and a couple of friends to sneak over and grab unused sockets at the start of the game. It’s a great way to get my econ boosted, or start cranking out troops right next to the enemy.
I always try to make sure to take out sockets on the way to the enemy base, that way it’s harder for the enemy to regroup. However, I also like to just attack the sockets with a few troops, and then move the bulk of my army around the other side of their base. As soon as they get their troops over to defend the sockets, I rush in and take out their base.
Designer Notes
Justin Rouse, a skirmish map Designer, gives us one of his tactics:
I like going with a Forge infantry rush on this map because of the extra building sockets near the starting bases. I quickly clear the rebels there and build 2 supply pads on the those sockets. The extra resources allows me to pump infantry and warthogs at the same time. I use this force to get over to the enemy’s free standing sockets since many players will build on them quickly and use the extra buildings to tech/boom faster. If I can take down these buildings I can usually put my opponent into a hole off the start. At that point, if I can keep the pressure on them they’ll begin to crumble.
The other notable thing to do on Beasley’s is to get the Life Support hook in the center. The mistake a lot of people make is they go for this too early in the game. This hook is extremely powerful (+20~25% to total max pop with reinforcements upgraded) but its power will go unused if you acquire this hook before you’re ready to use the population space. You should always wait until you’re near pop cap before fighting the tough rebels at this location, but even if you can’t make use of the pop room its still a good idea to make sure you’re in control of it and not your enemy.
Crevice 2v2[modifier | modifier le wikicode]
Designer Notes
Paul Jaquays, Skirmish Map Artist, talks about developing Crevice:
Memorable game maps spring from a melding of design intent and fortunate accidents. It can begin with an innovative design layout, perhaps pushing a tried and true layout from an earlier RTS in a new direction. It develops as designers attempt clever, but technically risky game play gimmicks. It takes final shape with art that pushes the envelope. For every map that succeeds, there are likely to be two (or more) that fail, stumbling, and then falling never to rise again on the path to production. Crevice was a map that stumbled more than once, fell, yet got back up and kept going.
Crevice a.k.a. Crevasse, etc. started with the earliest pack of map designs. It was one of the first maps I worked on as I shifted from model-making to map making on Halo Wars. Like Repository it began as a Shield World Interior (aka "Halo style") map. Given the "circular" layout and how Forerunner artifacts were originally placed on the map, it was sometimes confused for Repository. Not the best thing if one is trying for memorable.
Good maps are often built around a "gimmick," some game play function or activity that needs to be supported or encouraged. Initially, this gimmick was "Transport." The center of the map had an isolated central platform with a valuable forerunner artifact that could ony be reached by air-lifting army out to it. Coincidentally, it was also a strategic position upon which artillery pieces and turrets could be placed (this was pre-modular bases). Through the early stages of Halo Wars development, the Transport feature waffled between unsatisfactory functionality and simple unfunctionality. Long before Transport became a working feature, the notion of using it in Crevice had been discarded.
Despite this stumble and near fall, Crevice survived because it had an intriguing layout of start positions. Players, both allies and enemies, began relatively near each other towards the center of the map. To reach an enemy, players had to go away from them first to the outer portions of the map.
During development, Crevice shifted from the inside of the Shield World to the outside. To achieve this, I painted over a screen capture of the current version of the map, sketching out ideas for details on notebook paper. The design rework of the map had turned the central platform into a big hole. I suggested changing this into a playable area, a partially buried circular Forerunner platform. One feature I wanted to play up was the "bouncy-ness" of the warthogs, so where possible, I sculpted in small steps and shelves into the terrain. The UNSC portable bridges were adapted from the early campaign maps (via a quick paint job that turned snow to yellow dust) and retasked on this map (kudos to artist Don Gagen for both the original bridge and the clean-up for this map).
The switch to Shield World Exterior brought with it two new game play features centered around the Flood creeps infesting the map. The First, and core concept was "the Flood come out at night." Art created a day and night light-set for the map. Programming implemented a way to cycle and blend between the two light sets. Design built complex, yet elegant paths for flocks of flying flood to follow, focusing on the foundation locations of the player bases.
It worked. It was beautiful to behold. It was a serious game play challenge. Yet it completely flushed game performance down the toilet and ultimately, had to be abandoned.
The second concept was related to the first, that of the Flood Slayer, a mobile Forerunner artifact, player-capturable and controllable (possibly a vehicle or a super sentinel). I don't remember this going much beyond the idea stage, though there may have been something built for it (super sentinels eventually appeared in other maps). I definitely never got the chance to play test it.
Another idea abandoned, another stumble, even a fall. But it was not a failure. By this point Crevice was a a nearly complete production map well on its way to completion and despite the failed Flood features, was still a fun map, and just as important, a memorable map.
If I have any regrets on this one, it's that we didn't get to implement those awesome toxic slime waterfalls into the map.
Paul Jaquays is a former Ensemble Studios artist who now develops games as Senior Level Designer for CCP North America.
Multiplayer Notes
Duncan Stanley, Community Manager for Halo Wars, on Crevice:
Crevice can be a confusing map, since there aren't any direct paths from each teams starting location to the opponents bases, except by air. There are plenty of extra bases on this map for expansions, as well as 4(!) reactors across the map. Given the large distance and creeps in between everything, it is usually a good idea to team up with your ally to capture objectives.
I usually go for the reactor near the Flood expansion near me and occupy that early on. It gives me a bit of early warning if my opponent comes at me that way, and the extra tech is very nice as well. I also try to take that base early, since it's the closest expansion to the opponents main base. If I manage to get it, I try to make that base my unit producing one, so that my opponent is pressured constantly. You do have to be careful of air units coming at you over the very short gap between bases though, anti-air turrets or a Wolverine or two are very helpful on this map.
If I know that the game is going to drag on, and it's going to be a big battle for the Flood-expansion, the 2 free bases inbetween my ally and me are also a great resource to use. If I can convince my opponent to live with just his 1 flood expansion, I can sometimes get both of the back bases, and churn out a bunch of air units to harass my opponents while my ally takes out their bases. Crevice is a pretty good non-standard map for trying new things.
Docks 2v2[modifier | modifier le wikicode]
Designer Notes
Justin Rouse, Designer on Halo Wars, talks about his strategies on Docks.
Iterations: The_Docks, our city map on arcadia world, was a difficult map to create because we had to stick to our core gameplay which did not include any building to building fighting which is the usual type of fighting style you see in city based conflicts. We also placed a rule on ourselves that because this map was on Arcadia, in a pristine UNSC city it couldn’t have large forerunner structures in it nor could it have the look of a large covenant presence. This limited the designer of the map a lot because it took away a lot the available in game “hooks” we had available to add to gameplay. What we settled on was a large section of the city of “Pirth” that conveniently had only one passable location in the center to move between two sides. We also added a few covenant towers to help defend this large choke point that can give some flavor to the large battles that usually occur in this location.
Tactic: Because of the choke point and decent travel time from one side to the other early in the game, it’s pretty safe too boom up. This is why I really like using Cutter and elephant/marine rushing on this map. If I can setup my Elephant near the enemy bases and get it pumping I can slow down their boom sometimes, even keeping them off the open base location near their start area while my partner boom/techs freely. This tends to leave me behind the curve a bit but I can still get to ODST’s and just support my teammate until we can get the win.
Multiplayer Notes
Duncan Stanley, Community Manager for Halo Wars, on Docks:
Docks was a map that I hadn't really playtested much on during development. I was usually playing Campaign missions or 1v1 games, so I never really got into many 2v2 matches. When Halo Wars first launched I was online playing Multiplayer games every night after work to get out there and talk to people in game and get a feel for how the Community was going. I was doing pretty well, about 14-0 in 1v1 games, when all of a sudden I found myself on Docks. It's a 2v2 map, but due to a glitch was in the 1v1 hopper for a time. While the game was loading, I looked up my partner's game stats on HaloWars.com so I could see what he had built in previous games. This tactic was usually pretty good, as I could build a counter without even scouting!
Unfortunately my tactic only works if my opponent doesn't adapt to my strategy. I had pumped out a few Flame Marines and built a turret and was waiting for resources to expand to one of the many free bases on docks when my opponents Brute Chieftan showed up with a few packs of Brutes. A melee ensued and my units got crushed by his skillful micromanagement and kiting. I was pumping out more marines, and my turrets were having an effect, when a Banshee showed up, and then another, and then another. I had spent too much time countering his ground units that I had completely forgot about the huge wall in the middle, and the necessity of air units. To end this quickly, he wrecked me. I was too confident that since I knew what he was going to try, that I didn't really try to adapt. So don't be too confident!
Fichier:HW-The Docks (render 01).jpg Fichier:HW-The Docks (render 02).jpg Fichier:HW-The Docks (render 03).jpg
Labyrinth 2v2[modifier | modifier le wikicode]
Programmer Notes
Chris Stark, Programmer on Halo Wars, talks about his strategies on Docks.
During the development of Halo Wars, I did a lot of work on the teleporters in the game, including the ones on Labyrinth. Teleporters sound awfully easy to write, don’t they? Unit goes in one side, unit appears on the other side, done! Sadly, there are a variety of fun edge cases that have to be dealt with. One of my “favorite” teleporter bugs that came up during development resulted in units going through the teleporter leaving tire tracks going across the entire map.
Behind the scenes in Halo Wars, when you move a unit to a new position, it’s interpolated, so when I moved the unit across the map to the other teleporter, it was interpolated across the map. When vehicles move, they leave tire tracks, so presto! Tire tracks across the map. Admittedly, it was pretty funny but nothing we could ship. Fortunately, fixing this was as easy as turning the interpolation flag off when a unit went into the teleporter and then back on when it reached the other side.
Multiplayer Notes
Duncan Stanley, Community Manager for Halo Wars, on Labyrinth:
Labyrinth is one of my favorite maps, mostly because it was the one that was Dave Pottinger (Halo Wars Lead Designer) demo'd on G4TV at E3 2008. If you haven't seen it, you definitely should look for the video online, it's one of the funnier game demos I have seen. It brings a new meaning to turkey bacon.
As far as gamplay goes, Labyrinth was one of the maps I played most while playtesting. There was a really good challenge the designers set for us, which was fastest time to beat 2 Legendary AI players in a 2v2 skirmish. The Skirmish AI is pretty good at keeping you from having both natural expansions at the same time, so it was always a back and forth for me and I usually ended up losing until I had one of the balance testers as my partners. He showed me that having a good defense, only going for 2 bases total and going for air on this map is very effective, given that it takes quite a while to traverse the map. Trying to keep and hold both expansions can be tough, so take your time and get a good foothold before going for both.
Repository 2v2[modifier | modifier le wikicode]
Designer Notes
Paul Jaquays, Skirmish Map Artist, talks about developing Repository:
Repository was the first map that we took to a completed, beautified state. To sell the idea of large-scale combat in the Halo setting, we needed a map that boldly said "Halo" with features familiar to players (and more importantly, the makers) of the original Halo settings. The point of this map was not to tell a story, but to send the message: "Ensemble Studios can do Halo." The Ensemble Studios method of operation was to get the game up and running as quickly as possible and then to iterate changes during development. This map had "iteration" as its middle name. The initial design from Vance Hampton called for a large lake with crossing paths through it. The idea was that the lake would reflect the sky and a Halo rising through it. No Halo artifact actually appears in Halo Wars, but we wanted to reinforce the idea of "Halo" in any way possible. The water tech wasn't quite ready for prime time, so we looked for alternatives. I suggested the idea of a large Forerunner artifact across a deep pit for the crossing. Ensemble modeler Rob Walden built it and development was off and running.
Early 2007 saw the first completed version of Repository (then called "the Halo map"). Primarily developed by Ensemble artist Patrick Thomas, this was a land of subtle terrain blending, muted colors, narrow paths, rough terrain, and the unrestricted placement of bases and other buildings. Players captured Forerunner power stations to earn resources. Very little of what can be seen in this map survived into the final game. The effects guys put a lot of effort into river that runs through the map, including the appearance of moving water, waterfalls, and spray. But the game was about to undergo an extensive refit, resulting in play much closer to the final version and the need to totally rework this map from the ground up. The river, sadly, became an early victim to those changes.
The decision to go with modular bases (all structures as attachments to the main base building) and the need for obvious, simple, wide pathing in the skirmish maps forced the team to make a hard choice. Scrap this map or rebuild it from scratch. Paths were laid out again by design, and my in-depth involvement with Repository began. Eventually, it became like a second home for me as play changes required tweak, after tweak, after tweak ... a process that went on for easily a year and a half.
The new "rules" for maps required specific locations for player bases, linked by clear paths. Paths were widened, terrain textures repainted and simplified, and large open areas flattened to become the new homes for player bases. Less map space could be used for unique terrain features. Drawing from a number of sources, including other Halo Wars maps, the E3 Demo, and Halo plant images by concept artist Won Choi, my paint over showed where I wanted to take Repository (it was still called the "Halo" map at that point). We had proved the point that we could do Halo, so this just needed to be an interesting map. I wanted to get across was that the large Forerunner structures would be the map's navigation landmarks. One full edge of the map had a Forerunner chasm. Another edge was defined by a massive building with a half-open door (adapted from the E3 Demo). One half of the map had natural canyon walls and paths. The other had metallic walls and roadways.
The concept painting was the work of an afternoon or so, but the work on the map itself would take weeks, spread out over months. A new central platform that I adapted and scaled up from one made by artist Matthew Goodman for the Artifact campaign scenario replaced the original. Ensemble artist Don Gagen did the final polish on it and other the other Forerunner artifacts. The lake shown in the paint over initially made it into the map -- you can see it in some of the many early screenshots made in Repository. But, as often happens during game development, it was eventually sacrificed to performance issues, losing the one truly unique landmark in the map.
Paul Jaquays is a former Ensemble Studios artist who now develops games as Senior Level Designer for CCP North America.
Tactics
Duncan Stanley, Community Manager for Robot Entertainment, on Repository:
Repository was one of the most played Playtest maps for me. Ben Donges and I would often team up to take people on in playtest on this map, and as I recall we were one of the first play a 1v1 no rush on this map and went head to head with full pop armies. Before the game was optimized for performance, it was a bit rough but a lot of fun. Some of the early iterations had problems with random crate placement, and I ended up with all of the crates on the map directly in front of my main base. I think I won that one.
As far as strategies go, the circular nature of the map and the distance in between starting locations often means a good bit of time goes by before the first attacks happen. And the narrow entrances towards each base make turrets a powerful defensive measure. I usually make a push early to capture an expansion very early on, and try to boom a bit to get some units. The Hook in the middle is a great way to get some veterancy for your units by killing the defenders and get a unit or two. A lot of people also don't expects through the hook since the defenders are pretty tough, so it can make a great way to surprise someone's lower base.
Terminal Moraine 2v2[modifier | modifier le wikicode]
Designer Notes
Paul Jaquays, Skirmish Map Artist, talks about developing Terminal Moraine:
While I did some development on several of the icy maps, Terminal Moraine was the only Harvest world skirmish map that I developed from start to finish. Based on a layout design by Ensemble game content designer Vance Hampton called "Bridge", the core play concept involved Forerunner hard light bridges like those in the Artifact campaign scenario. Players could toggle these bridges on and off. During testing and development, this play feature changed into timer-controlled bridges, but the idea of isolating resources from ground-based forces in the early to mid game (by way of temporary bridges) stayed.
Up to this point, the ice-style Harvest skirmish maps all focused on frosty Forerunner artifacts. I looked for a story I could tell about the human occupation of Harvest and found it in the smoldering ruins of the campaign's Alpha Base. My map concept relied heavily on images clipped from map screen-shots and very little on detailed painting. The point of this was to quickly tell and sell the map's story and show how (for the most part) it re-tasked existing resources. Re-tasking was important because most of the modeling team would be assigned to player units and campaign assets until the last month or so of development.
I started map development by literally copying and pasting a large chunk the Alpha Base ruins into one corner of the map. This established a particularly unique landmark in that corner. These large landmarks in skirmish maps help players immediately know where they are and and let them navigate from point to point by in-game visual references. Ideally, each "corner" of any skirmish map is visually unique, and this was my design goal with Terminal Moraine. I enlarged the original layout to allow for "sculpting room" around the map edges, allowing me to better define features. Otherwise the playable area would jam up against the map edges on all sides, leaving little "art space" in the map. The two Forerunner platforms actually ended up needing that edge space to accommodate later game design changes.
In the final stage of development, Terminal Moraine became the poster child for memory-related performance issues. Between the multitude of textured models brought in with the Alpha Base ruins, the necessary Forerunner objects, the variety of terrain textures I thought necessary (originally), and the detailed sculpting of portions of the map, Terminal Moraine was spilling over its memory budget in every direction. One of the reasons that all these complex, memory-intensive assets could work without difficulty in the campaigns, but caused serious problems for skirmish map developers was that campaign maps had to worry about fewer player assets. Campaign maps (particularly the maps early in the game) used an intentionally limited number of player and enemy A.I. controlled units. But skirmish maps had to handle ALL of the UNSC units, ALL of Covenant units (and sometimes the Flood units too) AND up to three active enemy A.I. players. That meant tighter restrictions on memory available for map development.
As one of the last artists allowed to "touch" game assets, I spent the final weeks of development optimizing the skirmish maps for shipment. Though I had to be heavy-handed with Terminal Moraine, it kept the essential flavor of the original visual concept.
Paul Jaquays is a former Ensemble Studios artist who now develops games as Senior Level Designer for CCP North America.
Multiplayer Notes
Duncan Stanley, Community Manager for Halo Wars:
Terminal Moraine is another one of those maps that I played a lot of during the playtesting of Halo Wars. It starts you off right next to your teammate, and there aren't too many hooks on the map, only a pair of Reactors on the "islands," making this one of the tighter maps in terms of space and resources.
I've always tried to take the Island base across the lightbridge first, even though there is a Rebel base right next to my base. This allows me to cap the reactor and have the possibility of a turret or two up on the island making it fairly defendable.
Given the maps broken up middle, I find air to usually be very strong on this map. You can do hit and runs on an opponent's forces and run back to your island base to regroup and repair. The small map lets you hit enemy bases or defend your very quickly with air forces.
Memorial Basin 2v2[modifier | modifier le wikicode]
Designer Notes
Justin Rouse, Skirmish on Halo Wars, talks about the design of Memorial Basin
Memorial Basin, the map based on a design of “excess”. The goal, instant action. First, the close proximity of players starting locations is the number one driving force causing players to mix it up with each other early. Second, hooks! There is an abundance of them littered all over the map. There are Reactor hooks tucked safely behind each team’s starting location, while Supply Elevators and extra Building sockets line the sides of the map between enemies. Cover locations scattered throughout the middle are good for mixing things up defensively or offensively.
Lastly, there are the extra base locations which are further from your enemy than your starting location and more importantly, unguarded. This allows players to quickly make the decision to expand and execute it with little hindrance. Without the worry about clearing creeps away from the base first, nor excessive raiding because of its close proximity to a player’s starting location, we found players were trying all sorts of strategies based around when to expand. At the end of the day this map is about aggression, and that’s exactly how we wanted it.
Multiplayer Notes
Duncan Stanley, Community Manager for Halo Wars:
Memorial Basin is a great DLC map, a real change up from other maps in terms of strategy. Both teams are directly across from each other, making it really easy to hit and run. The open bases are great to grab early and get it going. I usually try to make my second base my economic base and my first base my unit producing base. All of the extra hooks lying around the map are also great to grab giving you a good bonus, and denyng your opponents any advantage.
Always go grab the bunch of crates in the middle, building an extra scout to scoop them up can be really helpful. The cover in the middle of the map is a bit of a red herring, most of the action in my games happens around the outside of the map. It can be good to garrison some infantry in there just as a scout, though, in case your opponents go over the middle. Grabbing the extra building slots around the outside of the map and putting in a unit producing building is a great way of quietly building a small force to harass your enemies base while your main force is elsewhere.
1v1 Maps[modifier | modifier le wikicode]
-
Tundra
-
Blood Gulch
-
Chasms
-
Pirth Outskirts
-
Release
-
Barrens
-
Blood River
Tundra 1v1[modifier | modifier le wikicode]
Artist Notes
Paul Slusser, Skirmish Map Artist, talks about Tundra:
Tundra, home of the World’s Luckiest Mega Turret. I always wondered if someone would notice that 3 meteors crashed into the ground, just missing it? Speaking of those craters, I remember Shannon Dees, an artist at Ensemble, spending a lot of time perfecting those ground shattering, lava filled, smoke fuming holes. It’s funny how we’ll spend the most time on what you would think would be the simplest of things, the terrain. We see it every day on our way to work, in movies, in books, and on HDTV, so we know what it should look like. It’s one of those things when your art is off by just a little bit, it just looks terrible! But since it’s only off by just a bit, it usually can all be fixed with a subtle tweak here and there and then all of sudden; PERFECTION!
Tundra was my personal Legendary A.I. test map. I liked it because I could sometimes funnel his attacks by garrisoning in the sniper towers. Those sniper towers are great as an early warning system to incoming attacks, especially during the early game when the A.I. has a huge advantage on you. Most maps don’t have such stall tactics as this, so it’s a good Legendary practice map.
Designer Notes
Justin Rouse, Multiplayer Map Designer, talks about Tundra:
Iterations: Tundra, the large open 1v1 map with a Mega turret shooting everyone. Sounds like an easy bar to hit but the Mega turret was cut from the story and was no longer going to be created at one point, so I was left with just a large open 1v1. Since I still wanted some interesting decisions to be made I put in more craters to break-up the map, but that alone just didn’t seem interesting enough watching people play this map in playtest. This is when I came up with the wall tower hooks. Putting the wall towers and the higher difficulty creeps guarding the close expansion bases gave me more of the game play I wanted to see for this map. Later on in the project the Covenant Mega turret was back in the production plan and was back on the map and became my favorite one to play.
Blood Gulch 1v1[modifier | modifier le wikicode]
Design Notes
We wanted a throwback map for Halo Wars that Halo Players would be familiar with. Blood Gulch is one of the more popular Halo multiplayer maps, and it was an easy choice. It's nice and open, with some cliffs on the sides for variety. The little nooks and crannies made excellent places for crates, and keeping the teleporters in roughly the same place was an easy call.
The original Blood Gulch wasn't a square, more of a rectangular canyon, so we had to do something funky with it so that Players wouldn't be scrolling over empty space. We had to use a larger base map, and then restrict the viewing area to a rectangle.
We put the hooks on the outside of the map and sort of isolated so that players who take them can have a big advantage. The 2 extra bases in the middle of the map are close enough to each other that a lot of fighting takes place within range of their turrets, and that middle area can be a great place to control.
Tactics:
Blood Gulch is a small map with little in between you and your opponents bases. Well, there are the extra bases with their guards in the way, but you should try to take those as quickly as possible. If you're feeling spunky, go for your opponents extra base, and try fortifying it early. It will be quite a surprise for them when they come to take it to be met with some turrets and a small army.
The hooks are also very important, each team has a reactor close by on one side and a Supply Elevator on the other. Getting both reactors early can enable you to tech up without having to spend a base slot on a Reactor, although it is risky if you lose one of them.
Chasms 1v1[modifier | modifier le wikicode]
Design Notes
Justin Rouse, Skirmish Map Designer, on Chasms:
Chasms was the map that was shipped with the Multiplayer Alpha Test that Ensemble and Microsoft used internally, so it required a lot of testing to make sure that everything was in good shape for semi-public consumption. It has changed quite a bit since its inception mainly due to it being the Inaugural map for Halo Wars. Chasms was the measuring stick for a lot of the systems used in HW, whether they be technical, strictly visual, or gameplay based.
The first thing that sticks out in my mind is the wrestling match between height(visual look) and gameplay. Large cliffs and hills look really good, especially when they can contrast the depths of the center chasms but when they interfere with how a player sees units and things on his screen that’s obviously bad. There we many adjustments to the hills and cliffs near the center bases to account for visibility issues that arose after alpha test feedback had us move the starting location from the now corner expansion bases the center ones where they live now. We quickly learned what players could live with and those hills were just too high. For whenever we felt we needed something to be really tall for the feel of the map, we pushed those areas towards the edge of the map where visual interference is much less painful.
Tactics
Duncan Stanley, Community Manager, dishes out the dirt on Chasms:
Chasms was the map that was shipped with the Multiplayer Alpha Test that Ensemble and Microsoft used internally, so it required a lot of testing to make sure that everything was in good shape for semi-public consumption. It has changed a bit since then, but it’s still a great 1v1 map. The direct short path between you and your opponent can often lead to some crazy fast rushes. You are just a stone’s throw away, and getting a turret or two up quickly can often be a game-changer. There also lots of crates all around your starting area, so building a second scout and grabbing yours (and your opponents crates!) can help you get a leg up quickly.
If a rush doesn’t happen in this game, grabbing the supply elevators in the corners of the map is a great way to get some experience for your troops and a steady supply of resources. Rebel Bases cover both expansions, and can be difficult to take early on if you are skirmishing with your opponent, but can really make all the difference if you have an expansion and your opponent does not.
Another great tip is to plan some Spartans or Jackals in the Watchtowers in the middle bridge, they provide some great early warning to anything coming across the bridge, and can often be fairly difficult to take down, making them great for delaying your enemy.
Pirth Outskirts 1v1[modifier | modifier le wikicode]
Artist Notes
Paul Jaquays, Skirmish Map Artist, talks about developing Pirth Outskirts:
I hold to the design philosphy that even skirmish maps should tell stories that reveal something about the the game world's history and recent events. Each of my Halo Wars maps, including Pirth Outskirts strives to achieve that. Like most assignments, this one began with a basic, unadorned map layout from design. In this case, a simple, elegant cloverleaf layout by designer Kevin Holme and an instruction to set the map on the jungle environment of the Arcadia game world. I started low-tech and roughed out my ideas for the game setting in a simple pencil sketch. I initially envisioned a sort of "Shang-ri-la" lost city setting with the ruins of a lost civilizaton in the center and plateaus edged by cliffs. The four leaves of the clover (Clover was also the working title for the map) had to be flat, but from the first, I saw the map as a series of descending terraces, connected by sloping roadways that would visually guide the players through it.
In my concept paint-over (a quick digital painting that shows the map and major features as they might appear in game ... with notes and reference photos attached), I built around the idea that wherever mankind explores, tourists typically follow. I developed the area as a remote vacation destination with mysterious ancient ruins, modern hotels, and dramatically steep, mist-shrouded cliffs into which breathtaking waterfalls poured majestically. On top of this, I layered the planet's recent, tragic history. Covenant bombs had cut the area off from the cities and turned the man-made structures into smoking rubble. The wreckage of mankind's attempt to flee the invasion was littered through the setting.
During production development, the hotels became smouldering Oni research stations, but the rest of the map stayed refreshingly true to both the designer's original layout and my initial art ideas, right down to the majestic waterfalls.
Paul Jaquays is a former Ensemble Studios artist who now develops games as Senior Level Designer for CCP North America.
Tactics
Duncan Stanley, Community Manager, gives his take on how do to well on Pirth Outskirts.
Pirth is a pretty small map, and although it seems like there's a lot of stuff in between you and your opponents base, it only takes a few seconds to get there.
The reactor hooks are also very important to get, and if you're quick, you can skip building a reactor at all, which can make all the difference in the world.
Infantry is usually pretty helpful here, given how small the map is, and the hooks. Infantry is also good to have because they build so quickly, and are good to spam if you need to.
A game for me usually involves building a few extra scouts to grab crates and the free base slot. I usually try to grab my "opponent's" base, just to throw him off his game. From there, I usually try to grab one or both reactors, and start pumping out units. After scouting, I'll try to make some counters which usually involves a couple pieces of armor.
If I can get 2 extra bases up and running while keeping my opponents to 0 or 1, I usually have the game in the bag. I always try to keep some pressure on their main base, and that's easy to do. I usually end up losing if I'm put on the defensive early on and am not able to expand. A couple turrets at a forward base will usually turn back an early enemy advance.
Release 1v1[modifier | modifier le wikicode]
Designer Notes
Justin Rouse, Multiplayer Map Designer, talks about the making Release:
Making of: While creating Release, the task at hand was to create a map where it wasn’t the typical faceoff starting locations where you walk straight across the field and attack your enemy. On top of that, the flood had to play a part but without being able to control them while keeping them relevant throughout the game. This is where the abandoned Forerunner installation that the flood are stuck in idea came from. Originally, you could target where the flood would attack, then players still wanted the ability to continually control where the Flood move and attack but we felt that didn’t work inside the Halo lore. This is how we ended up with the Flood moving out of their Gate attacking a location on same side of the map but then we let a “Flood AI” take control of the army and randomly decide what should be attacked next. Having the Forerunner installation in the center of the map and tucking the players off to the corners on the same side, while forcing them to move around the installation to get to each other satisfied the non-typical 1v1 start at the same time. The Flood then become a sort of buyer beware item because they should attack your enemies side first but they may choose to attack you soon after from anywhere on the map. These two things combine to make Release a very Unique map in the Halo Wars arsenal.
Tactics
Release is the only map where you have a little bit of “Control” over the flood in Halo Wars. You quickly learn that controlling the Consoles that release the flood is key to victory but many players make the mistake of using the flood as a solitary attack strategy. If you know you can open the flood gate multiple times in quick succession, at the level three flood army size, then they may be enough on their own but until you’re at that point you should use the flood as a supplementary attack force. Early on whenever you’re planning an attack, if possible you should open the release gate around 20seconds before your attack will hit the enemy. This makes the flood army a distraction while the real attack comes in from hopefully and undefended angle. Keeping your opponent busy in two locations can usually earn you a win but if you’re mistiming your attacks and just feeding flood into his large army you may be throwing experience at his forces causing them to gain veteran levels ahead of you which is definitely not the desired outcome.
Barrens 1v1[modifier | modifier le wikicode]
Barrens Notes
Justin Rouse, Multiplayer Map Designer, talks about Barrens:
Going into the DLC we knew we wanted another flood map but which size to make? I choose a 1v1 because of the frequency of games played on 1v1 maps and only having 1 that you could see some of the cool flood units on just didn’t feel like it was enough. We felt the layout was pretty interesting because of it’s “maze’ishness”. As with most maps, to make the gameplay interesting you need to draw the player away from his starting area. Barrens has no problems drawing a player out, when looking at the map from a top down view you can slice the map into thirds using the cliffs and valleys as divide between each segment. While looking at the map in this manner you can see why a player wants to get into that middle third pretty quickly. With 2 Reactor hooks, 2 Expansion base locations, and a Spire of Healing in the center controlling the middle third can be very advantageous. The other benefit of the windy layout is the added distance between players at the beginning of the game. The little bit of extra time it takes can make a rush a bit easier to defend but at the same time a player can’t allow their enemy to control the center of the map for too long either. All in all, we’re pretty happy with how Barrens turned out and hope you enjoy it as well.
Tactics
Barrens has some interesting gameplay for any leader but Forge is my favorite option. The layout and hooks play into Forge’s strengths exceptionally well. Barrens forces you to leave you expansions more secluded from each other than normal, early game this can allow a Forge player to gain a bit more advantage from his boosted supply pads while other players have to spend their early game resources upgrading pads if they don’t want to risk the far away expansion. When playing as Forge my endgame plan is always formulated around having an army of Scorpions and upgrading them to Grizzlies as soon as possible, but most of the time this is easier said than done. Although, Barrens is another 1v1 map that offers the reactor hook, clearing away the nearby flood and gaining access to one of these hooks allows me to jump up in tech level quickly. It’s also the only 1v1 map to have the healing spire on it. This hook synergizes well with a tank strat because it can help you keep those expensive units alive and gaining veterancy throughout the course of the game. Combine all these advantages and your Forge heavy armor can have a lot of success on this 1v1 map.
Blood River 1v1[modifier | modifier le wikicode]
Blood River Notes
Justin Rouse, Multiplayer Map Designer, talks about Blood River:
Blood River, a straight forward 1v1 map that has a little bit of something for everyone. With starting positions placed in opposite corners, up on a hills, and a river with only 2 crossings above it, even the inexperienced player can feel relatively safe at the onset of a Blood River match. Then there’s the look, we chose this map to be set inside of the Forerunner shield world simply because we didn’t have one in that location yet. We always intended to make sure players of all game sizes (1v1, 2v2, 3v3) have a chance/choice to play on all our worlds. Blood River was a good fit because it has cliff edges, places for Forerunner embellishments like the light bridge, and we could work in some of water. For the Halo Wars enthusiast, we found two of most sought after hooks are the Bonus Reactors and Supply Elevators. Putting in two of each on this map makes a lot of players giddy, which we like.
Tactics
Duncan Stanley, Community Manager, spits some game about Blood River:
Blood River is a small enough map where infantry can be very effective. The many hooks on the map, and scout towers make infantry a smart choice. The base positions at the top of hills make turrets very effective here, but you still need to get out with your army to collect all the crates and get into a hook or two early on. If you're feeling lucky, crossing the bridges and capturing one of your opponent's hooks is also a good strategy. With that you can force your opponent to fight for his own hooks and that can be very advantageous.
If you can hold the middle and keep pressure on your opponent, you can spend some time building armor or flying units which can really turn the tide of a battle, especially against UNSC. If they build a flame thrower army to counter your infantry, some flying units can really tear them up.
Given how small the map is, it's very risky to try to boom on this map, map control early on is much more important than going for late game heroics with super units.
UNSC[modifier | modifier le wikicode]
In Halo Wars you’ll find that the UNSC field a very versatile arsenal. You can enlist the aid of Marines, Warthogs, Scorpions and Hornets to strategically control areas of the map or advance on new ones. Specialized UNSC leaders offer you further tactical abilities such as calling in support from Spirit of Fire above and highly specialized units that can make the difference between winning and losing.
Whether its close air support, infantry, or heavy armor, the UNSC can field the units to get the job done.
UNSC Firebase[modifier | modifier le wikicode]
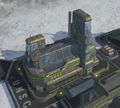
The UNSC firebase combines the needs of a tactical communication command center and expansion into both a barrack and a production facility capable of assembling combat vehicles. The firebase itself is a variant of the old colony starter units constructed out of polycrete and powered by a small hydrogen reactor. Because gaining a foothold quickly was key to fighting insurrection throughout the colonies, Spirit of Fire can directly deploy the entire assembly unit of a firebase making it immediately useful. That ability has also proven invaluable in the ongoing war with the Covenant and is often considered a key advantage of the UNSC on the ground.
Turret
"The best offence..." (MBT)
Turret defenses are available for Command Centers only, while battlefield commanders will have to defend their Fire Bases with their military units. Turrets are assembled below ground and then elevated into one of four available slots. A virtually unlimited supply of ammunition flows to the turret from below the base, allowing it keep firing as long as it’s exposed tower and weapon remains intact.
The base turret mount supports the very versatile M202 XP Machine Gun. It can be upgraded to the vastly superior M41 Light Anti-Aircraft Gun that is found on most Warthogs, firing the 12.7x99mm rounds. They can also be upgraded with Anti-Air Missles, Anti-Personel Flame Mortors, and Rail Cannons
- Armament
M202 XP Machine Gun
Bombard Rail Cannon
- Crew
Automated
- Role
Anti-Armor
Field Armory
The UNSC's Field Armory is a cross beatwean a machine \ fabrication shop, and a research labratory. This is where the most advanced technology for the UNSC is created by dedicated engineers and scientists.
UNSC can increase it's population cap here, as well as improve the turrets, and boost the speed of its infantry. There are also special technology that can only be researched by individual leaders.
Reactor
Power is everything. A UNSC firebase is powered by a small hydrogen reactor which allows it to operate some pretty sophisticated systems. In order to set up a base quickly, it has to be small, but these power plants are modular. As you expand your base of operations and field more complicated weapon systems you are going to need more power. Base sockets can facilitate the addition of larger hydrogen reactor units which provide the juice to allow you to field more and more sophisticated weaponry. These additional reactors built into your base sockets are even modular and can be upgraded, but at great expense, to double their output.
Protect your base reactors. They are prime targets for enemy raids. When they are destroyed, you will no longer be able to field your heavy hitting Scorpions or Vultures.
Supply Pad
The UNSC Supply Pad allows a base to recieve shipments from orbiting ships. The supplies are dropped shipped onto the pads where they are gathered by robot cranes and brought into the base. These crates contain the resources needed to build units, reasearch upgrades. Supply Pads are the economy behind the war machine of the UNSC, and can be upgraded to produce more resources faster.
Warthog - M12 LRV
Even the most minimal of firebases is able to produce the Warthog, and for good reason. These versatile vehicles are incredibly valuable for reconnaissance and can be refitted to fill a number of supporting roles for UNSC forces. The most basic of these variants doesn’t have the standard M41 Light Anti-Aircraft Gun equipped, sacrificing this firepower for speed, vital for recon patrols. Fire Bases have the ability to not only add the M41, but also the M68 Gauss Cannon to seriously boost the firepower of this unit against armored vehicles.
Barracks[modifier | modifier le wikicode]
This is no UNSC academy. The Barracks is a rustic shack compared to the comforts of a real training center, but then again a Marine in the field isn’t generally thinking about creature comforts. They make you soft.
The Barracks simply houses the raw recruits and equipment needed to field squads of UNSC Marines. A quick briefing, visit to the armory, and you’ve got boots on the ground.
Marines
“Boots on the ground.”
The backbone of UNSC ground forces is the Marine. The UNSC Marine Corps can trace its roots back all the way to the United States Marine Corp, formed in the 18th century. The people behind the triggers haven’t changed a great deal in all these years, far less so than the theaters of operation. Marines first started setting foot on other planets during the Interplanetary War (2160-2170), taking the fight to Mars and officially becoming the UNSC Marine Corps after their victory in that conflict.
Marines come equipped with a variety of weapons, but generally it’s the MA5 series of rifles. A squad of marines can lay down some impressive firepower, and can even damage armored vehicles with a volley of grenades or rockets if they’re available. Versatile, relatively cheap to equip, and fast get on the ground, Marines are a potentially strong force to put into action. En masse, they haul around enough firepower to put the hurt on just about anything an enemy can field.
- Armament
MA5 series battle rifle
Grenades
- Crew
5 person squad
- Role
All purpose
Flamethrower
“Hellbringers”
These specialized Marines are outfitted with a Napalm spewing NA4 Flamethrower. First seeing action during World War I, flamethrowers have changed remarkably little since those early days in the trenches. These specialized Marines carry a potent mixture with them in a tank that is spewed through a gun onto the target. A variety of mixtures have been created for work in various atmospheric and gravitational conditions, but they all work similarly to fry just about anything.
Squads of Flame Marines aren’t particularly common in the UNSC arsenal. Usually they are only called in to exterminate the most firmly entrenched enemies, which means that they also take plenty of casualties themselves. They know it’s a dirty job, but someone has to do it.
- Armament
NA4 Flamethrower
Flash Bang
- Crew
2 person squad
- Role
Anti-infantry
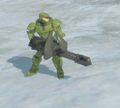
Spartan
“If they want war, we’ll give ‘em war.”
The Master Chief, John-117, didn’t always fight alone. He was part of the SPARTAN-II program that started with 150 child candidates, 33 of which made it through the intensive training and physical augmentation procedures. On November 1, 2525, the program was accelerated with the discovery of the Covenant threat and the Spartans adopted their MJOLNIR armor. The war was underway, and the UNSC had over thirty of these super soldiers at their disposal.
Summoning a Spartan to the battlefield is not a guarantee of victory, nor is it something to be taken lightly. It requires a significant investment of time and energy to field Spartans, so they’re not a commonplace sight. When they do end up on the scene though your opponent will have to learn to take the threat of a Spartan on the battlefield seriously, or suffer the consequences.
- Armament
MA5 series rifle
MJOLNIR armor
- Role
Special Forces
AirPad[modifier | modifier le wikicode]
Air superiority can be of vital importance, not only for intelligence gathering but also for tactical strikes at your enemy’s weak points. A UNSC Airpad is a surprisingly sophisticated structure that not only houses the maintenance crews required to refit, repair, and rearm Hornets, it also houses banks of simulation pods to train pilots in everything from the basics to advanced tactical maneuvers. Desperate times can call for desperate measures, and on more than a few occasions Fire Base Commanders have thrown any able bodies they’ve had at their disposal into the simulators for a crash course in operating the Attack VTOL-14. With the Spirit of Fire at your disposal to provide trained air crews, chances are you won’t have to resort to these sorts of unorthodox procedures.
Vulture
"Death From Above"
The Vulture is one of the UNSC's most powerful units. Basically a highly armed flying assault tank packed to the brim with weapons. The UNSC Vulture is the largest aircraft fielded by the UNSC. It is designed to deliver massive damage to enemy ground troops after air superiority has been achieved. It is slow moving but carries an impressive armament of 2 twin-autocannons and rocket silos that can be used to deliver a devastating barrage to enemies in a wide area.
Crewed by highly trained UNSC pilot and gunners, the Vulture is an expensive unit and is usually reserved for difficult or lengthy battles. Being slow, it is vulnerable to anti-aircraft fire and enemy aircraft, but it is surprisingly resilient.
Armament: Dual Autocannon Turrets, Rocket Barrage Ability
Crew: 6 Crew Members
Hornet
Hornet - Attack VTOL-14
These single-seat support aircraft are tremendously versatile. The Hornet is often used as close air support to UNSC forces and can also be seen flying alongside larger craft such as the Pelican in a supporting role.
This fast attack vehicle is a versatile anti air unit, but can also take the fight directly to the enemies ground units. Having a few hornets in a battle can really change the battle in favor of the UNSC.
- Armament
Twin Heavy Machine Guns
Missile Pods
- Crew
1 Pilot
2 Marine gunners
- Role
Antipersonnel
Vehicle Depot[modifier | modifier le wikicode]
A Vehicle Depot contains the heavy equipment and crew to assemble vehicle kits. Hydraulic cranes serve as the muscle to move everything from Cobra chassis, Scorpion armored plates, and the impressive selection of weaponry that these vehicles can bring to bear. The parts may take awhile to arrive, but when the engine from a new Scorpion fires up in the Vehicle Depot, the rumble is felt all across the base.
Scorpion Tank
M808B Main Battle Artillery Tank (MBAT)
The Scorpion Main Battle Tank is a mainstay of UNSC forces. It is a flexible weapons platform that can take a beating as well as dish out a great deal of damage, although its main gun can have difficulty penetrating some heavy armor vehicles. Some would call it a jack of all trades, but a Scorpion can truly be the ace up your sleeve when it comes to breaking through an enemy position.
The Scorpion can be upgraded with a variety of technologies that allow it to pack more of a punch. Whatever flavor they come in, your enemy will learn to respect the Scorpion or end up under its treads.
- Armament
90mm Main gun
7.62mm Machine Gun
- Crew
1 Driver
1-2 Gunner(s)
- Role
Main Battle Tank
Wolverine
Wolverine – MAAT-9 Wolverine Main Anti Air Tank (MAAT)
Wolverine is a fast moving maneuverable anti-air vehicle. In its arsenal are two pods of Argent V Missiles that are located on the left and right of the driver and gunner seats. These missiles are specialized to target and deliver their warhead to an aircraft with great speed and maneuverability. The missile pods are quite large and can be reloaded via a mechanical system in the Wolverine, which stores a small supply of missiles onboard.
The targeting systems and anti-air capabilities of the Wolverine are second to none, but it can also angle its missile pods to launch missiles at ground targets. Stationary targets and buildings are your best bets for actually hitting anything. Although air vehicles generally know to steer clear, the Wolverine is quite vulnerable to anti-armor attacks both from vehicles or heavily upgraded infantry. The driver has the use of a XM511 Heavy Grenade Launcher for defense from ground attacks, which can potentially wreck soft targets, but truly this support vehicle relies on heavier units to defend it from a determined attack.
- Armament
Argent V Missile Pod X 2
XM511 Heavy Grenade Launcher
- Crew
1 Driver
1 Gunner(s)
- Role
Anti-Air
Cobra
Cobra – SP42 Cobra (MBT)
Although the Cobra has the ability to fill two roles, it is a specialized fighting vehicle. It has specialized armored panels that are designed to deflect hardened projectiles and absorb massive amounts of damage from explosive shells. Although it is not particularly fast, the Cobra is highly maneuverable. It totes around a pair of Rail Cannons on its turret that fire a high-density slug designed to penetrate enemy armor.
Alternately the Cobra crew can choose to lockdown the vehicle and deploy the larger Rail Cannon which fires a more high velocity explosive artillery shell. The sacrifice of mobility is made up for in the range advantage that elevating the big gun can offer. The artillery round is multipurpose and can cause a great amount of damage to just about anything it hits, including enemy fortifications.
- Armament
2 X Rail Cannons
Bombard Rail Cannon
- Crew
1 Driver
1 Gunner(s)
- Role
Anti-Armor
Covenant[modifier | modifier le wikicode]
The Covenant is a large alliance of several alien species that are more technologically advanced than Humans during the events of Halo Wars. First started as a loose non-aggression pact between the Elites and the Prophets, the Covenant quickly assimilated other races using superior firepower and tactics. The other races were given the choice of joining the Covenant or being destroyed.
Over the many years since the Covenant was founded they have taken over a large part of the Galaxy and have declared humanity a heretic race and are engaged in a Genocidal war against them.
Citadel[modifier | modifier le wikicode]
"All hail the Great Journey"
The seat of power in the Covenant. This is the main nerve center for the interplanetary warfare of the covenant. It offers a modular system that makes aggressive colinization and rapid deployment of troops and armor effective.
This is the where the political and religious leaders of the Covenant or the Covenant issue orders to the various races and cultures that create the Covenant.
Shield Generator
One of the main advantages that the Covenant possesses over the UNSC is that they are able to field shield equipment on infantry, vehicles, space craft and structures. The Covenant Shield Generator occupies a building slot at the Citadel and provides a powerful shield over all of the Citadel’s structures, vastly increasing the defensive strength.
Covenant shield technology is repurposed Forerunner technology and requires vast amounts of power to use. Once the shield is drained, the buildings underneath the shield begin to take structural damage. Over time though, the shield will begin to regenerate back up to full strength. Expensive, and taking up a build slot, commanders who wish to use the Shield generator must choose between a strong defense, and other options.
Warehouse
You Store Things Here
The Covenant Warehouse utilizes gravity lifts to bring down supplies to Covenant bases. From here, workers move the supplies to the proper area for further use by the Covenant commander. The Warehouse can be upgraded to increase the rate of incoming supplies.
Turret
The Covenant Citadel comes with four available turret slots. These slots have room for light, medium and heavy turrets and can be further upgraded with specific anti-vehicle, anti-air, and anti–infantry turrents. The plasma mortar, fuel rod, and Needler upgrades can prove devastating against their opposing units. Approaching enemy units would be wise to take our Turrets quickly or risk their forces being decimated.
Turrets are expensive, and while they provide a very effective defense, they cannot hold out forever and will need military support in order to ensure victory. Turrets are very effective against Leader units and aircraft.
Armament: Plasma Turrets
Crew: Automated
Role: Anti-Armor, Anti-Infantry, Anti-Air
Temple
The Temple is the main cultural and scientific building of the Covenant. This is where Prophets go to meditate upon Forerunner artifacts and how to best erradicate humanity. The upgrades that the Covenant research here are very expensive, however they are also very effective and powerful.
Scarab
The Scarab is the most frightening weapon in the Covenant arsenal. Repurposed heavy mining equipment, the Scarab’s mining laser can inflict massive damage across the battlefield. With anti-air turrets on top and a colossal laser, the Scarab is the most feared Covenant vehicle. It can climb over any terrain and although a slow, it is often the center of any battle it finds. Incredible expensive and slow to build, the Scarab is often seen late in battles and is often a deciding factor.
Something as big as the Scarab would be too expensive to conduct battlefield upgrade to, so there are no upgrades available.
Armament: Heavy Mining Laser, Anti Aircraft Plasma Cannons
Crew: A Lekgolo colony directs the Scarab from within.
Hall[modifier | modifier le wikicode]
The Covenant Barracks is home to the Well-trained and numerous infantry of the Covenant Forces. Grunts lead by Elites, Jackals and Hunters are trained here. The different races are housed separately according to their status in the caste system. Grunts, the lowest of the caste system performs many of the more demining tasks. The lone Jackals tend to only socialize amongst themselves, while the solitary hunter’s communicate with each other via their collective consciousness.
The powerful covenant upgrades are researched here as well, augmenting the covenant infantry with better energy weapons and armor.
Jackal
The Kig-Yar, or Jackals, is an Avian species often seen with shields and longer range weapons. They make up the bulk of the Covenant ground forces (after the Grunts). The Jackals are often used in scouting or sniping roles, using their superior senses to their advantage.
Armament: Beam Rifle
Homeworld: Eayn
Grunt
The Grunts, or Unggoy, are the foot soldiers of Covenant ground forces. Used in large numbers to overwhelm enemy positions, Grunts are weak as individuals but are a force to be reckoned with in groups. Almost always lead by a higher-caste Covenant infantry unit, such as a Brute or Elite, they can wield most Covenant weapons.
The methane tanks that they breath from sometimes explode with funny results.
Armament: Plasma Pistols, Needler
Hunter
The Hunters, or Mgalekgolo, are massive colonies of small worm-like creatures known as Lekgolo. These colonies of many smaller creatures take the form of huge, heavily-armored bipedal infantry. Carrying a massive shield and a Fuel Rod Gun, Hunters occupy a strong anti-vehicle role. Always appearing in pairs, they are more than a match for most UNSC Vehicles.
Armament: Special Hunter Shield
Summit[modifier | modifier le wikicode]
The Summit is the roost for all the the Covenants powerful air force. The quick Banshee, the deadly Vampire and the versatile Engineers are all built here. The upgrades that make the Covenant Air Force even more fierce are available here.
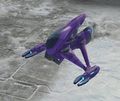
Banshee
The most frequently seen Covenant Aircraft is the Type-26 Ground Support Aircraft, or Banshee. Carrying one pilot, this versatile and nimble aircraft is used to scout and harass enemy forces. Carrying twin plasma cannons and a fuel rod cannon, the Banshee can deal serious damage to both ground and air forces. It also has been known to have a speed boost ability.
Armament: Twin-Plasma Cannons, Fuel Rod Cannon
Engineer
The Engineer, known as the Huragok by the Covenant, is a race of gas-filled alien creatures created by the Forerunners to perform maintenance on Forerunner structures. The Engineers are the only way for the Covenant to repair their building and vehicles during combat and are very effective, especially once upgraded. They automatically search out damaged machinery to repair. They have no defenses or weapons and are easily killed, although they can repair each other, but not themselves.
They can be upgraded to the State of Grace which increases their repair rate and to give them Harmonious Digestion increases their movement speed. The Engineers have the ability of taking apart random technological objects without issue and being able to put them back together exactly how they found them. This is probably their way of studying and understanding new technologies.
Role: Healing
Vampire
The Vampire is the mainstay of Covenant anti-air aircraft. With a heavy Needler turret, the Vampire can quickly overwhelm enemy air forces with a large barrage. Very effective in groups, it can bring an opposing aircraft down in seconds. When upgraded, the Vampire can drain enemy aircraft of their energy and cause it to crash to the ground, although this causes the Vampire to take damage as well.
The Vampire’s upgrades can be a game-changing element in air battles. The Stasis drain can lock down enemy air units while the stasis bomb can freeze enemy ground units for Covenant forces to pick off.
Armament: Heavy Needler, Stasis Drain Cannon, Stasis Bomb
Crew: 1 or 2 man crew pods
Factory[modifier | modifier le wikicode]
The Factory is the manufacturing facility for Ghost scouts, Wraith Tanks and Locust walkers. This building serves as a sophisticated warehouse for all of the land based vehicles in the Covenants arsenal, and the powerful upgrades for all of the units are also researched here.
The Covenant can build the Factory immediately from the get-go without having to upgrade the Citadel giving them early land based firepower.
Locust
The Locust, like the Scarab, is another converted mining vehicle repurposed for military use. The Locust uses a powerful mining laser to inflict great damage to buildings. Although slow and expensive, the Locust is still a serious threat to UNSC forces, and buildings. It has an incredible range and can hit enemy forces when even their longest range units cannot strike back. Once upgraded, a pack of Locusts can quickly decimate an enemy base in only a few seconds.
The Locust has two upgrades that can make it a more effective fighting machine, Overdrive to increase movement speed and a shield amplifier to increase how much punishment it can take.
Armament: Charged Plasma Cannon
Ghost
The Type-32 Rapid Assault Vehicle, called the Ghost by the UNSC, is a very commonly used scout vehicle by the Covenant. It is lightly armored and carries twin plasma cannons for armament. It is quick and excellent for harassing infantry and even UNSC tanks have trouble hitting it since it is so agile. Piloted by an Elite, it is very effective as a light vehicle.
The Ghost has very powerful upgrades such as a boost ability, additional thrusters allowing it to strafe and juke incoming enemy fire, and finally an energy shield that deflects incoming damage.
Armament:
2 X Plasma Cannons
Crew:
1 Driver
Role:
Scouting
Wraith
The Type-25 Assault Gun Carriage, also known as the Covenant Wraith is their main battle vehicle. Heaviy armored, it functions more like a tank than it’s artillery-like cannon would imply. It fires a heavy plasma blast at targets causing area of effect damage, and melting through enemy armor. The Wraith is fairly quick and can devastate enemy armor columns and infantry at range. It is also equipped with anti-personnel plasma cannons. They carry thick armor that is almost invulnerable to small-arms fire.
It’s upgrades include a heavier shield providing more defensive strength, a Scorch ability that allows it to set the very ground on fire causing extra damage and finally a plasma modulation upgrade that vastly increases the firepower of the main gun.
Armament: Plasma Mortar Cannon
Spirit of Fire[modifier | modifier le wikicode]
Exitus Acta Probat
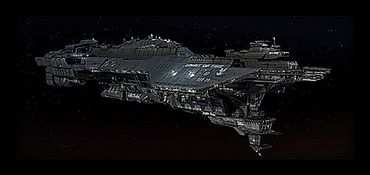
CFV-88
Constructed: 2473
Class: Phoenix
Captain: Cutter
A.I.: On board - "Serina"
The Spirit of Fire was originally a colony ship, transporting equipment and colonists in the UNSC's expansion efforts. In 2520 the ship was refit with a Magnetic Accelerator Cannon and other armaments to serve as a warship. Huge storage bays that used to house machine parts now carry everything from Warthogs and Scorpion Tanks to construction supplies for fire bases in hot spots in front line engagements or in rearguard actions.
The campaign in Halo Wars follows the Spirit of Fire and her crew as the UNSC deals with the first deadly encounters with the Covenant.
Timeline[modifier | modifier le wikicode]
Page 1[modifier | modifier le wikicode]
- 2160-2200
Early Conflicts:
- This period in human history was marked by a series of brutal conflicts between various governments and factions in our Solar System. Conflicts of particular historical importance included the Jovian Moons Campaign, The Rain Forest Wars, and a series of clashes on Mars.
- As overpopulation and political unrest on Earth increased, a number of new political movements formed. The most noteworthy dissident movements of the period were the "Koslovics" and the "Frieden" movement. The Koslovics—supporters of neo-Communist hardliner Vladimir Koslov—sought a return to the glory days of Communism and the elimination of corporate and capitalist influence, particularly in orbital facilities and offworld colonies.
- The Frieden movement was a resurgence of fascism, springing from anti-Koslovic sentiment that had taken root in the Jovian colonies (largely backed by Unified German Republic corporations, frequent targets of Koslovic "workers' crusades"). "Frieden" literally means "peace"—in this case, they believed that peace could be achieved only once the "oppressors on Terra Firma" were eliminated. [1]

- 2164
Interplanetary War:
- UN-sponsored military forces began a pattern of massive buildups, culminating in the first real interplanetary war. After the successful Marine deployment on Mars, recruitment drives and propaganda tactics strongly bolstered UNSC (United Nations Space Command) forces. UN forces defeated Koslovic and Frieden forces on Earth, then began a systematic and dedicated drive to crush their remnants on the various planets they held throughout the system. At the conclusion of these brushfire conflicts, Frieden and Koslovic forces were defeated in the face of a massive, unified and very powerful UN military. [1]
- 2170
Expansion:
- A unified Earth government was formed in the wake of these conflicts. Now, the victors were forced to deal with a less obvious but equally serious threat: overpopulation and a massive military that had no enemy to fight.
- In the postwar period there were massive population surges and the overpopulation, coupled with the destruction and famine bred by the Rain Forest Wars, threatened to destabilize the economy. [1]
- 2291
Faster Than Light:
- A team of researchers, physicists, and mathematicians working in secret developed the Shaw-Fujikawa Translight Engine, a practical means of propelling spacecraft across vast interstellar distances. This new engine allowed ships to tunnel into "the Slipstream" (also called "Slipspace"). Slipspace is a domain with alternate physical laws, allowing faster-than-light travel without relativistic side-effects. Faster-than-light travel is not instantaneous; "short" jumps routinely take up to two months, and "long" jumps can last six months or more.
- The SFTE generated a resonance field, which when coupled with the unusual physics of the Slipstream, allowed for dramatically shorter transit times between stars; however, scientists noted an odd "flexibility" to temporal flow while inside the Slipstream. Though no human scientist is sure why travel time between stars is not constant, many theorize that there are "eddies" or "currents" within the Slipstream—there is generally a five to ten percent variance in travel times between stars. This temporal inconsistency has given military tacticians and strategists fits—hampering many coordinated attacks. [1]
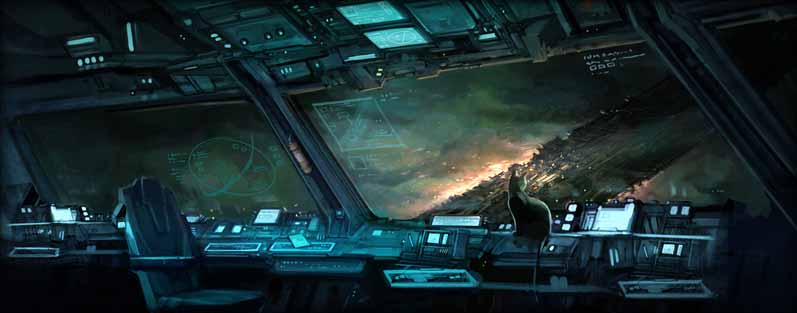
- 2310
First Wave:
- The Earth government unveiled the first in a line of colony ships—and volunteers were in great supply. Conditions on Earth had deteriorated in the face of overpopulation, so hitching a ride out to a colony became an attractive option.

Each colony ship was assigned military personnel and escort ships to help better utilize the massive (and expensive) standing fleets that, in the collapse of armed dissent, were soaking up a great deal of funding and resources.
Because FTL travel in this period was still fairly new and expensive, colonists and military personnel faced a stringent regimen of physical and mental testing. In theory, only the best-qualified citizens and soldiers were allowed to colonize "nearby" worlds. This was the birth of the Inner Colonies. [1]
- 2362
The Odyssey:
- The Odyssey launched on January 1, 2362. The lead ship in a fleet of colony vessels, the Odyssey—laden with troops and terraforming gear—spearheaded the colonization of a new world. This sparked the first wave of human expansion beyond the confines of the Solar System. [1]
- 2390
Inner Colonies:
- By 2390, the colonization of the Inner Colonies was fully underway. There were 210 human-occupied worlds in various stages of terraforming, and the population burden across human-controlled space was largely stabilized. [1]
- 2468
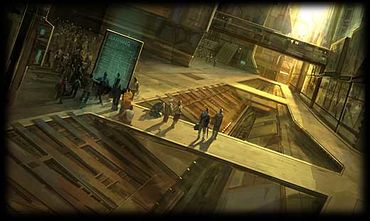
Harvest:
- The colony of Harvest is established in this year by the UNSC Skidbladnir. The ship is eventually used for materials to build the colony, its power plant is used to power the capital city of Utgard. [3]
- 2473
UNSC Spirit of Fire:
- The UNSC Spirit of Fire CFV-88 is constructed. It is a Phoenix class colony ship that is later refitted into a warship. [4]
Sources:
1 - Halo: Combat Evolved Timeline
2 - Halo: The Fall of Reach
3 - Halo: Contact Harvest
4 - Halo Wars
Page 2[modifier | modifier le wikicode]
- 2490
The Birth of the Outer Colonies:
- Expansion continued at a rapid pace, and by 2490 human space encompassed more than 800 worlds throughout the Orion Arm of the Milky Way (ranging from fairly well-tamed planetary strongholds to tiny hinterland settlements). Outward expansion continued, and the Inner Colonies become a political and economic stronghold, though they relied heavily on raw materials supplied by the Outer Colonies.
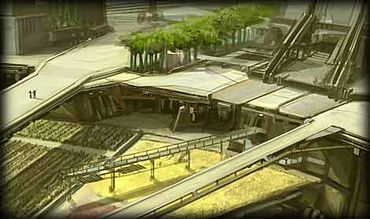
- During this period, the planet Reach (orbiting Epsilon Eridani, right on Earth's metaphorical doorstep) became the UNSC's primary Naval yard and training academy. Reach was a major producer of warships and colony vessels, as well as a training ground for covert operatives and Special Forces. [1]
- 2520
Spirit of Fire Refit:
- The UNSC Spirit of Fire undergoes a series of refits in this year that transform it from a colony ship into a warship. Refits include the addition of a Magnetic Accelerator Cannon to the ship.[4]
- 2525
February 3, Harvest:
- The Harvest orbital platform made long range radar contact with an object. It was made of an unknown material. Contact with Harvest was lost shortly thereafter. [2]
- 2525
April 20, The Argo:
- Sent by the Colonial Military Administration to investigate the loss of contact with Harvest, the scout ship Argo arrived in-system on 20 April. Other than a brief transmission to confirm their exit Slipstream position no further reports were made. [2]
- 2525
October 7, Contact:

- Fleet Command assembled a battlegroup to investigate and they enter the Harvest system on 7 October. The battlegroup consisted of the destroyer Heracles, commanded by Captain Veredi, as well as the frigates Arabia and Vostok.
- They discovered drastic changes to the planet Harvest’s surface and no sign of the three million colonists. An alien ship was detected in orbit. The ship did not attack until Captain Veredi tried to initiate communications. They responded by broadcasting the following message in the clear, in our own language: “Your destruction is the will of the Gods…and we are their instrument.”
- The Vostok and Arabia were lost with all hands while the Heracles jumped out of the system, but took several weeks to return to Reach due to damage sustained in the battle. [2]
- 2525
November 1, War:
- The UNSC is placed on full alert. Vice Admiral Preston Cole is mobilizing the largest fleet action in human history to retake the Harvest System and confront this new threat.
- The Spartan II program is accelerated to help deal with the new Covenant threat. [2]
- 2531
The Battle of Harvest:
- Admiral Cole's war fleet engages the alien warship responsible for the decimation of the colony, scoring a victory (though the battle cost Cole two-thirds of his battle group). Only a last minute tactical inspiration turned the tide of battle. After returning to Earth, Cole-promoted to Admiral-learns that a number of outlying colonies have been destroyed, leaving behind no survivors. Cole begins to move his fleet around, trying to intercept the invaders. Ground and ship-to-ship battles begin in earnest, raging throughout the Outer Colonies. During one ground engagement, Human forces capture one of the aliens. Before succumbing to his wounds, interrogators learn that the aliens refer to themselves as "the Covenant" (roughly translated). [1]
- 2535
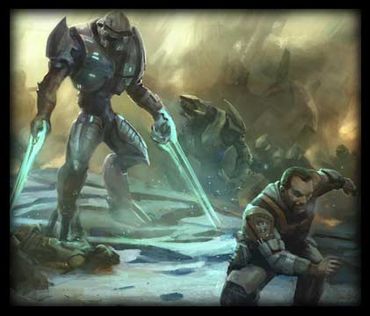
The Outer Colony Massacres:
- Over the next four years, Cole's forces were hammered, despite his excellent leadership and tactical brilliance. It was simply a matter of being outgunned; Covenant kill ratios tend to top four to one in ship-to-ship combat.
- By November of 2535, virtually all of the Outer Colony worlds had been destroyed by the Covenant. The "Cole Protocol" was established by military order: All human vessels must ensure that Covenant forces do not find Earth. Human ships—when forced to withdraw—must not travel on an Earth-bound vector, even if that requires jumping into Slipspace without proper navigational calculations.
- If blind jumps are not possible, the ship's captain must order self-destruction if capture is imminent. In addition, it is also imperative that the powerful ship AI data cores not fall into Covenant hands, so part of this protocol involved either the removal or destruction of the ship's AI in extreme situations. [1]
- 2536-2552
The Siege of the Inner Colonies:
- Covenant forces swarmed into the Inner Colonies. For several years the war fell into a pattern: humans emerged victorious from isolated battles—typically during ground operations—but at a horrible cost. In space combat, the humans lost at a precipitous rate, and one by one, the colonies fell. [1]
- 2552
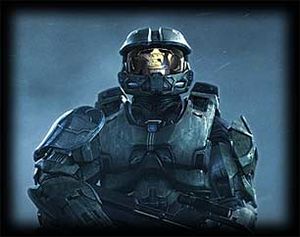
Halo:
- Covenant forces arrived at Reach and obliterated Earth's last major military stronghold. The battered cruiser, the Pillar of Autumn, fled the devastation, carrying with it the sole surviving SPARTAN. The SPARTANs—an elite unit of supercommandoes, equipped with the fearsome MJOLNIR assault armor—were created as the ultimate soldiers.
- Now, only one SPARTAN remains to carry the fight to the enemy. In accordance with the Cole Protocol, Captain Jacob Keyes—the Autumn's commanding officer—plotted a random, long-distance jump, hoping to lure the Covenant fleet away from Earth.
- After deactivating the drive, the Autumn dropped into a distant, uncharted system. There was a Covenant fleet in the system as well, near a planet-sized ring-shaped construct, "Halo." [1]
Sources:
1 - Halo: Combat Evolved Timeline
2 - Halo: The Fall of Reach
3 - Halo: Contact Harvest
4 - Halo Wars
Galleries[modifier | modifier le wikicode]
Screenshots[modifier | modifier le wikicode]
The images shown on this page are actual in-game screenshots and are not pre-rendered. Please click on any of the images below to view it at a larger size.
Featured Screenshot
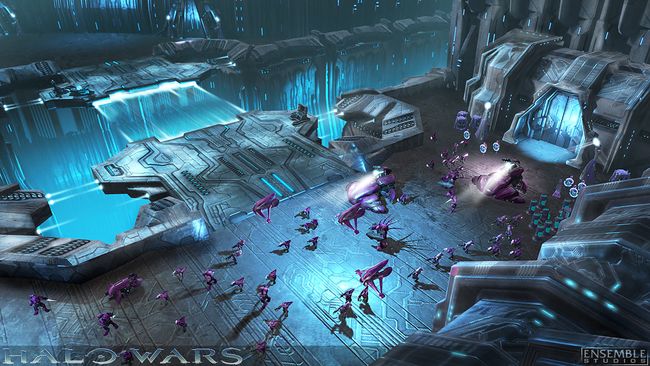
XBOX Live Screenshots
Leipzig 2008 Screenshots
E3 2008 Screenshots
Screenshots
Older Screenshots
E3 2007 Screenshots
Concept Art[modifier | modifier le wikicode]
Before any game goes into full production on the art front, artists have to flesh out the look of the environments, people, and vehicles. These pieces of art can be of great inspiration when creating a game, allowing artists to easily try out ideas for great big environments or intricate units quickly and easily, without the restrictions of a game engine. Here is a collection of some of the early concepts that our teams has been working on for Halo Wars, we hope you enjoy them.
Please note that because concepting happens early in the development cycle, they often depict ideas, scenes, or units that may not appear in the game.
Environment Concepts
Unit Concepts
Forerunner Structures
Ambient Life Concepts
Renders[modifier | modifier le wikicode]

As we develop the game we hope to share a number of renders here on our website. The latest images to be added for from the Five Long Years cinematic that we released at E3 2008. We have also added a render of the UNSC Spirit of Fire model that will be used in various cinematics for the game. The Spirit of Fire and her crew are featured prominently in the campaign for Halo Wars.
If you'd like to set one of the images below as your desktop wallpaper, simply click on the image that you'd like to use below and then right-click on it and select "Set as Background".
Cinematic Screenshots
Dev Blogs[modifier | modifier le wikicode]
Halo Wars Unit Stats
A lot of fans have been asking for the behind-the-scenes numbers for the units in Halo Wars.
This Excel Spreadsheet has all of the Unit Stats, but they are a bit complicated, so I’m going to do a walk through for a UNSC Unit and a Covenant Unit so that fans can get an idea of how much damage each unit does to another. Right click on the link, and Save to your computer. Then open it up in Excel or you can download the Microsoft Excel Viewer here: Microsoft Excel Viewer 2003.
It looks a bit complicated but I’ll try to break it down for everybody. I’ll start off with explaining some of the terms: At the top of each section is the name of the unit, for example Marine Squad. Below that, in this example, Infantry is the kind of Armor the unit has. (See the third tab for the Weapon Type vs. Armor chart). Bounty is how much Experience (XP) the unit gives to units that kill it. This Bounty is shared by all units that destroy the enemy unit.
Hitpoints are how much health a unit has.
DPS stands for Damage per Second. This is how much damage the unit’s specified weapon does without any upgrade. The Weapon Type is what type of damage that Weapon does. (See the third tab for the Weapon Type vs. Armor chart). Some weapons have a Damage over Time effect (DoT) that affects a unit after it has been attacked in addition to normal damage.
Upgrades are the techs you research that affect each unit. They usually have a damage or health multiplier in addition to their main effect. Multipliers stack, that is, the 2nd upgrade builds on top of the first in terms of hit points or damage.
Veterancy is the stars that appear over unit’s heads after they gain a certain amount of XP from killing units. Each unit has its own Veterancy table, and they do more and take less damage for each Star they gain through killing other units.
Below is the math for the Marine and Banshee, hopefully it will give players a guide on how to calculate the units health and damage at a given level.
FAQ[modifier | modifier le wikicode]
Combat[modifier | modifier le wikicode]
Q: How does combat work in Halo Wars?
A: Combat in Halo Wars is based on a Rock-Paper-Scissors model, so that one unit is countered by another unit which is countered by another. Tim Deen, the Lead Technical Designer on Halo Wars, wrote a Dev Blog that covers a great deal of ground related to the Combat System. It also includes graphs so you can see which unit counters what. Rock, Paper, Spartan Dev Blog.
Q: That’s all well and good, but I want some more details!?
A: Well it’s a good thing that Tim wrote another Dev Blog that provides more information about attack and armor types. Check it out here Under The Hood of the Halo Wars Combat System.
DLC[modifier | modifier le wikicode]
Q: What are the Halo Wars DLC packages and what do they contain?
A: There are two Halo Wars DLC packages, each is available for 800 MS Points on Xbox LIVE.
Strategic Options contains three different game modes along with four Achievements. The three additional game modes are
- Keepaway: Halo Wars’ version of Capture The Flag. A flying Sentinel spawns somewhere on the map and players must capture it and keep it alive to score points.
- Tug of War: You and your opponent battle to see who can get the most resources, buildings and army size while fending off your enemy.
- Reinforcements: Units are provided to each player every few minutes in waves, it’s up to the players to build upgrades and collect resources. Using only the units provided, players have to outwit their opponents.
Historic Battles is a pack of four maps, and also contains four achievements.
- Barrens: The flood infests this windy 1v1 map, and a healing spire in the middle will give the owner a large advantage.
- Blood River: The bridges over this map’s namesake river are key to victory in this 1v1 map.
- Memorial Basin: This 2v2 map features a large empty middle ground with plenty of bases around the outside.
- Glacial Ravine: Energy Walls and Mountains divide this map in two, giving players plenty of time to build armies before facing off. Be wary of air attacks over the terrain on this 3v3 map.
Q: I purchased and downloaded Historic Battles, but when I play multiplayer I’m not playing on the new maps, what gives?
A: In order to play on the new maps, all of the players in the match have to have the DLC. When all players in a match have the DLC map, there is a 40% chance they will get a DLC map. Otherwise a standard game map will be chosen.
Jargon[modifier | modifier le wikicode]
Halo Wars uses a lot of jargon, abbreviations and other words that a new player might be unfamiliar with. This is a guide to some of the words that players will use in game or on the forums.
Rush: To quickly attack the other player in the beginning of the game. This is effective because often times the other player is not ready to defend against an attack. For example: building 3 Warthogs, upgrading to Gunner and sending them to your enemy’s base at the 3 minute mark is considered a rush.
Micro: Micro is short for Micromanage. Micro is used to describe using quick reflexes to individually control your units so that they are more effective in battle. For example: moving a Warthog back and forth to dodge a Wraith’s plasma shots.
Turtling: Building a strong defense at your base to repel attacks instead of building an army to explore/attack the other player. For example: Building 4 turrets and keeping strong units at your base instead of building a larger army to attack your enemy.
Booming: Building a strong economy at the expense of a military. This can pay off as you will have a very strong economy and be able to purchase upgrade and build more units later in the game, but runs the risk of having too small an army early and being vulnerable to attack until you build up forces.
Kiting: The process of moving around your unit(s) so that an attacker has to run after your units, and your unit(s) take little or no damage. For example: Warthog with upgrades drive around in circles while Brute Chieftain chases it, the Warthog won't take damage because it is out of range of the Brute Chieftain's hammer.
Hogs: UNSC Warthogs
PoR: Prophet of Regret
BC: Brute Chieftain
Fine Gentleman: A term used on the forum in place of noob/newb/nub, etc.
Hooks: The buildings or structures around maps that provide a bonus when occupied with your infantry units. For example: Reactors, Supply Elevators, Mega Turret and Energy Walls can all be occupied by infantry.
DLC: DLC stands for DownLoadable Content. In the case of Halo Wars, there are 2 DLC packs. Strategic Options is a set of 3 different game types: Reinforcements, Keep Away and Tug of War. Historic Battles is a pack of 4 new maps, two 1v1 maps, one 2v2 and one 3v3 map. They are not required for Multiplayer, but do add quite a bit to the online experience. Both are available for 800 MS Points. Check out more information on the DLC here: DLC Section
Multiplayer[modifier | modifier le wikicode]
Q: How does TrueSkill™ work and how is it implemented in Halo Wars? A: The TrueSkill™ ranking system is what Halo Wars uses to rank and match players against each other in Multiplayer. It was developed by Microsoft Research and an in- depth explanation can be found at Microsoft Research’s website (http://research.microsoft.com/en-us/projects/trueskill/). Put simply, the formula to calculate TrueSkill™ has 2 parts. One is the player’s Skill and the second is how certain the TrueSkill™ ranking system is in that Skill level. The more a player plays, the more certain TrueSkill™ is in their ranking.
HaloWars uses TrueSkill™ for its 15 different Multiplayer Leaderboards. You can find those here http://www.halowars.com/stats/Leaderboards.aspx under Leaderboard Type: MP Skill, then select which Game Type Leaderboard you wish to see. Each Leaderboard has its own TrueSkill™ value, and they are not shared across different Leaderboards. For example, you can have a high TrueSkill™ rating in Standard 1v1 yet have a low rating in Reinforcements 1v1.
In Halo Wars, when a player searches for a game, the matchmaking system tries to match them against another person of roughly equal TrueSkill™. In team games, the TrueSkill™ rating of each team member is blended into one Team TrueSkill™ rating then used to find a match with another team with a roughly equal rating. While searching for a game, a player or team’s TrueSkill™ is briefly displayed onscreen. If a close match is not found by the system in a short period of time, it starts to broaden its match criteria until it can find a game.
When players of very different TrueSkills™ play each other, the resulting change may not be what you’d expect. For example, if Alice (Trueskill™ of 40) plays Bob (TrueSkill™ of 10) and wins, Alice’s TrueSkill™ will increase by a tiny amount. However, if Bob were to win his TrueSkill™ would increase by a good amount, but not necessarily a huge leap, especially if both have been playing for a long time.
On Tuesday, July 28th 2009 12:00am PDT, an issue with the Xbox LIVE Leaderboards wiped all Halo Wars Leaderboards. This caused the Leaderboards to revert to a Launch Day status, where matchmaking for all players is calculated as if no games had ever been played. The Leaderboards were unable to be restored, so all games played previous to July 28th were lost. From July 28th onwards, the Leaderboards are functioning normally and matchmaking and statistics are being processed as they should.
Q: I’m having trouble playing Multiplayer games on Halo Wars or other online games.
A: Go to the XBox dashboard - My XBox | System Settings | Network Settings | Test Xbox LIVE Connection. Do you get a warning for your NAT type? A restricted NAT could cause issues with online games. Check out Xbox.com’s support page for this issue.
Q: I have the Strategic Options DLC, why can I not view Leaderboards in-game for DLC game types?
A: Halo Wars in-game Leaderboards do not fully support the new DLC Game Modes, but you can view the Leaderboards for Keep Away, Reinforcements and Tug of War at http://www.halowars.com/stats/Leaderboards.aspx.
MatchMaking[modifier | modifier le wikicode]
Q: How does Matchmaking work in Halo Wars?
A: In Halo Wars, when a player searches for a game, the matchmaking system tries to match them against another person of roughly equal TrueSkill™. In team games, the TrueSkill™ rating of each team member is blended into one Team TrueSkill™ rating then used to find a match with another team with a roughly equal rating. While searching for a game, a player or team’s TrueSkill™ is briefly displayed onscreen. If a close match is not found by the system in a short period of time, it starts to broaden its match criteria until it can find a game. To break it down even further, when you start playing Halo Wars for the first time, your TrueSkill™ will be 1. Don’t worry too much about your early games, the more you play, the more accurate your TrueSkill™ will be. Even if you lose your first several games (try honing your skill in Skirmish against the AI, first!), Halo Wars will still try to match you up against people around your own TrueSkill™ level.
Check out the Multiplayer Section for a more in depth explanation of TrueSkill™ and Halo Wars.
Q: Why are there only 15 Matchmaking options for Halo Wars?
A: Due to Xbox LIVE restrictions on how many different Leaderboards a game can have, Halo Wars can only have 15 different matchmaking options. We have used user feedback and game statistics to determine the best 15 to have. This means that there is not every permutation of every game type available for play. All game types are available in single player Skirmish, or in Private Matches.
Rank and Points[modifier | modifier le wikicode]
Q: How do Rank and Points work in Halo Wars?
A: Skill level isn't always the best way for tracking a player’s experience with the game, so we also keep a total running score of all multiplayer, matchmade games you have played. As this global score for a player goes up, we award the players various ranks to reflect their experience with the game. See the Rank secttion below to see what total score is needed for the various ranks. To find your score (and rank), in game go to the multiplayer menu and select Service Record | Skirmish.
Q: How do I get more points?
A: One of the best ways to boost your score per game is to complete the game (as opposed to resigning or disconnecting). While you get a 40% bonus if you win, you also get a 20% bonus if you just complete the game. On team games if you are defeated, the award happens right then - not at the end of the game - so you don't need to wait around in that game unless you want to watch the action. There is only one Rank per Player, and it is not affected by position on the Leaderboards. This chart explains the ranking system and score needed to rank up:
Rank — Score Needed
Recruit — Play 1 Game
Lieutenant — 15,000
Captain — 30,000
Major — 60,000
Commander — 120,000
Colonel — 240,000
Brigadier — 480,000
General — 960,000
Q: Does Rank have anything to do with MatchMaking? I'm a Lieutenant and always getting matched against Brigadiers and Generals!"
A: No, Matchmaking does not use Rank. It uses the TrueSkill™ value of the players in the game. You can have players with low rank who have a high TrueSkill™ rating and vice versa. If your team has 3 Recruits on it, and the other team is all Generals, it's possible your team has a higher TrueSkill.


