Différences entre les versions de « Utilisateur:Hawk/Transcriptions web »
(Page créée avec « =Official Halo Wars Community Site (halowars.com)= ==Game Info== ===Overview=== '''''-"If they want war, we'll give 'em war."''''' <span style="color:#FF8000">'''The Gam... ») |
|||
| Ligne 68 : | Ligne 68 : | ||
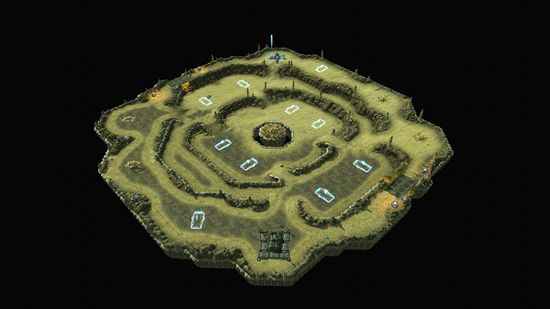
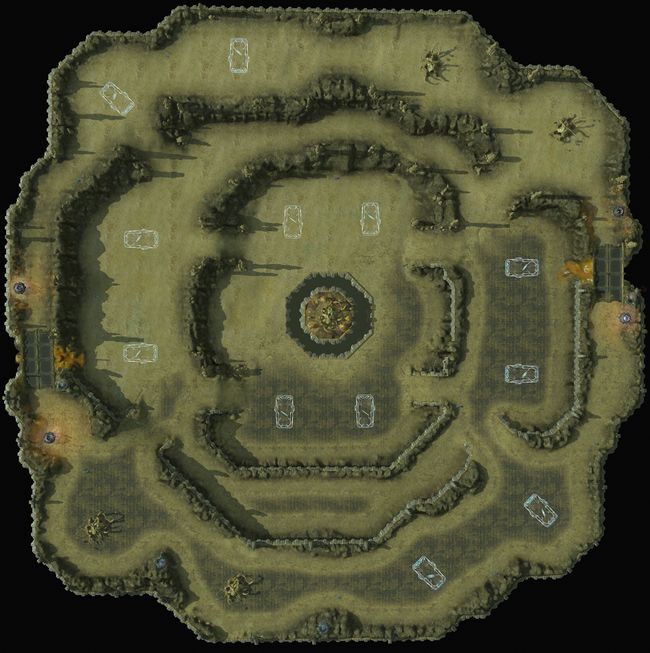
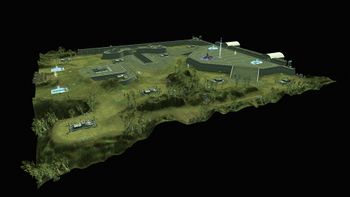
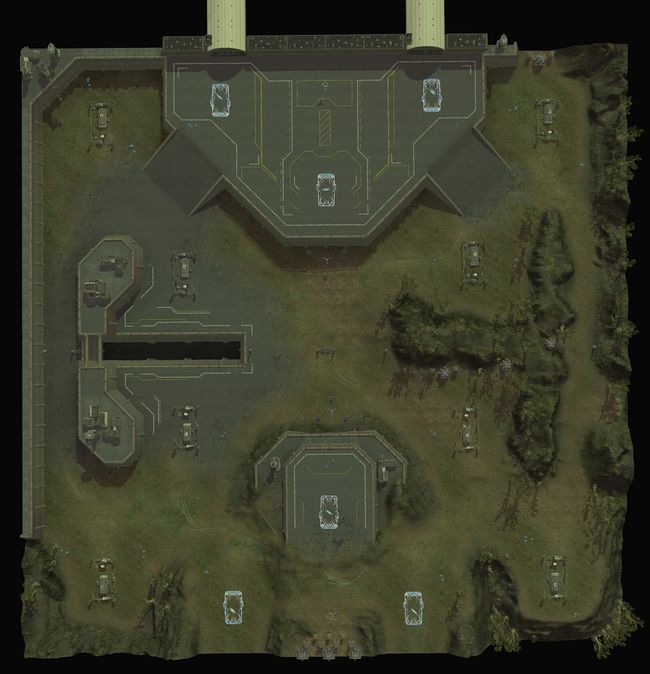
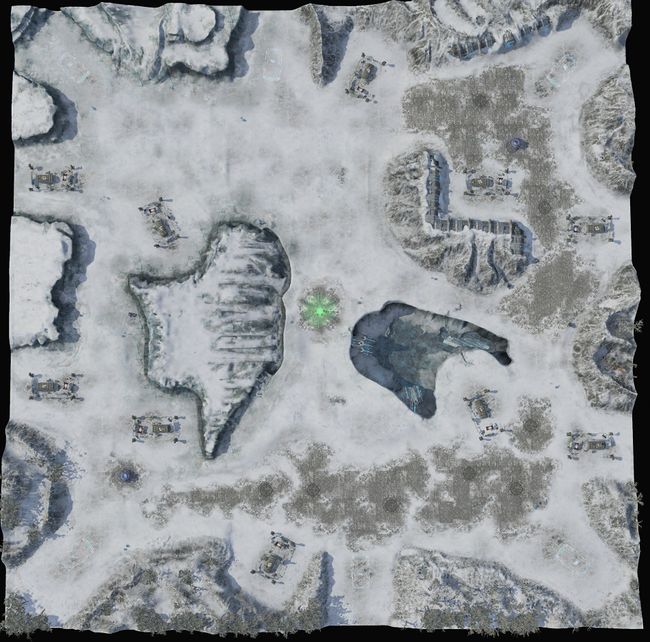
[[Fichier:HW-Fort Deen (render 01).jpg|550px|center|thumb]] | [[Fichier:HW-Fort Deen (render 01).jpg|550px|center|thumb]] | ||
<span style="color:#FF8000">'''Designer Notes'''</span> | <span style="color:#FF8000">'''Designer Notes'''</span> | ||
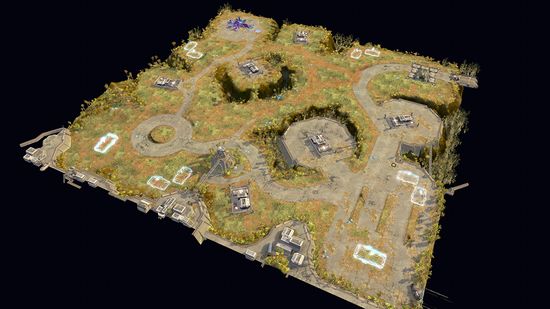
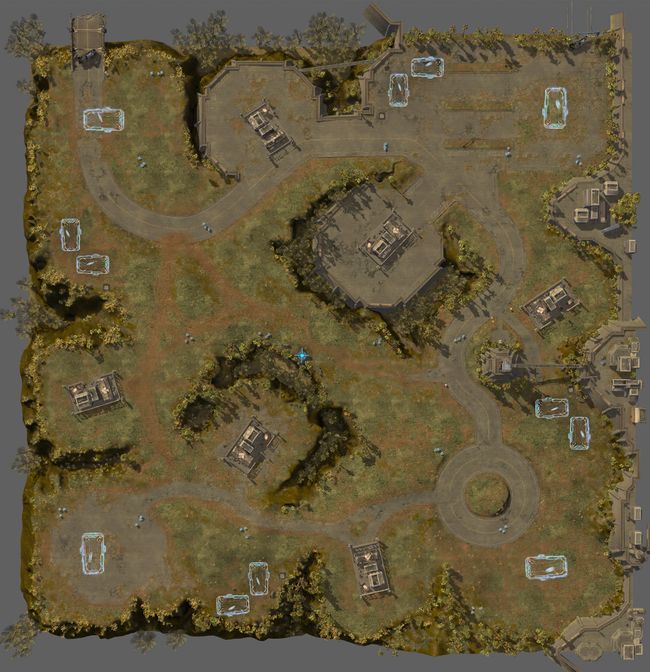
Fort Deen went through some iterations on gameplay because we wanted this map to feel like each player was pretty safe from the rush. Originally we only had one player per team start in the elevated “safer” areas with his two teammates starting on the outskirts. With the long distance from one side to the other on this map it was still easy enough for two players on one team to rush down the side of the map and hit the edge player with enough time to do serious damage before the edge player’s teammates could react and send help, very much like Frozen Valley and we wanted something different. The simple change of moving the starting locations for all three players up the ledge really helped achieve this. To reinforce this goal we put wall hooks and creep groups down the side paths to help hinder the early rush. | Fort Deen went through some iterations on gameplay because we wanted this map to feel like each player was pretty safe from the rush. Originally we only had one player per team start in the elevated “safer” areas with his two teammates starting on the outskirts. With the long distance from one side to the other on this map it was still easy enough for two players on one team to rush down the side of the map and hit the edge player with enough time to do serious damage before the edge player’s teammates could react and send help, very much like Frozen Valley and we wanted something different. The simple change of moving the starting locations for all three players up the ledge really helped achieve this. To reinforce this goal we put wall hooks and creep groups down the side paths to help hinder the early rush. | ||
| Ligne 83 : | Ligne 84 : | ||
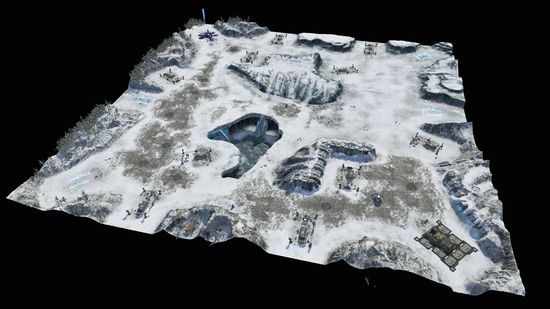
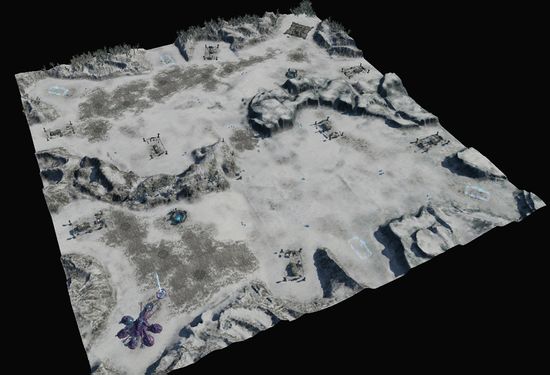
[[Fichier:HW-Frozen Valley (render 01).jpg|550px|center|thumb]] | [[Fichier:HW-Frozen Valley (render 01).jpg|550px|center|thumb]] | ||
<span style="color:#FF8000">'''Designer Notes'''</span> | <span style="color:#FF8000">'''Designer Notes'''</span> | ||
Justin Rouse, a skirmish map designer, dishes out some info on Frozen Valley: | Justin Rouse, a skirmish map designer, dishes out some info on Frozen Valley: | ||
Frozen Valley was the first 3v3 map designed during the development of Halo Wars. After Chasms, this was probably our most played map through internal playtesting. The layout went through one major tweak throughout development and that was the opening down between the teams that runs along the bottom edge on picture shown here. The first iteration had the hole as well as the mount near that bottom edge of the map extend all the way to the edge. Leaving a pocket only access through the middle by land units. It allowed the two bottom player on each team to build up safely. | Frozen Valley was the first 3v3 map designed during the development of Halo Wars. After Chasms, this was probably our most played map through internal playtesting. The layout went through one major tweak throughout development and that was the opening down between the teams that runs along the bottom edge on picture shown here. The first iteration had the hole as well as the mount near that bottom edge of the map extend all the way to the edge. Leaving a pocket only access through the middle by land units. It allowed the two bottom player on each team to build up safely. | ||
| Ligne 107 : | Ligne 109 : | ||
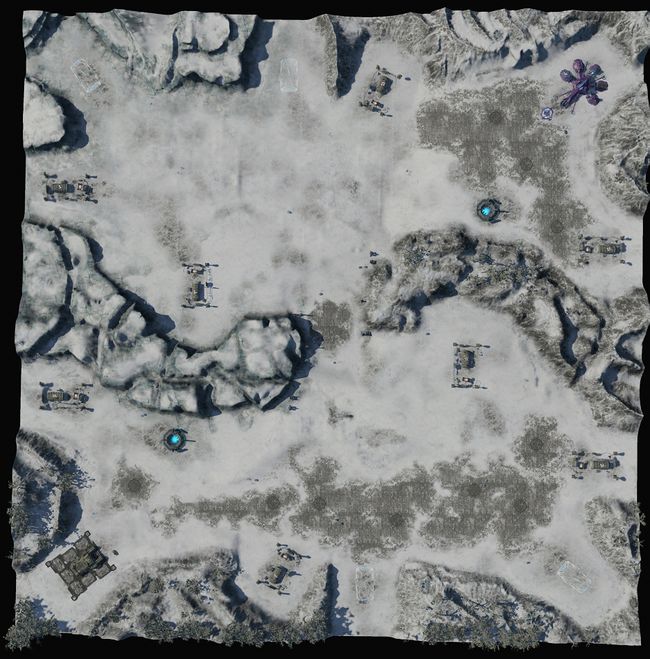
[[Fichier:HW-Glacial Ravine (render 01).jpg|550px|center|thumb]] | [[Fichier:HW-Glacial Ravine (render 01).jpg|550px|center|thumb]] | ||
<span style="color:#FF8000">'''Designer Notes'''</span> | <span style="color:#FF8000">'''Designer Notes'''</span> | ||
Justin Rouse, a skirmish map Designer, talks about Glacial Ravine | Justin Rouse, a skirmish map Designer, talks about Glacial Ravine | ||
| Ligne 114 : | Ligne 117 : | ||
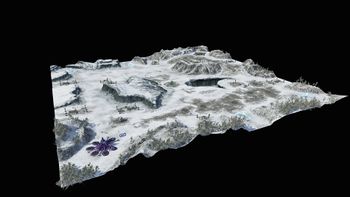
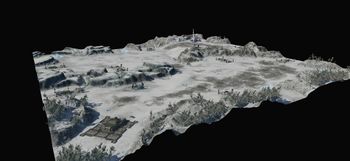
[[Fichier:HW-Glacial Ravine (render 02).jpg|350px|left|thumb]] | [[Fichier:HW-Glacial Ravine (render 02).jpg|350px|left|thumb]] | ||
<span style="color:#FF8000">'''Multiplayer Tactics'''</span> | <span style="color:#FF8000">'''Multiplayer Tactics'''</span> | ||
Tactics: On Glacial Ravine I like to use the Covenant and take advantage of the Scarab walking over cliffs and surprising the enemy with beams of death raining down from the hillside. Obviously, you can use any leader here but I prefer the Brute Chieftain for his Brute commandos. Using his brute commandos built from bases themselves allows me to use my building sockets to boom and get shield protection from air attacks. They also give me an infantry unit which I can use to garrison in the wall towers and hold the middle of the map for my team. | Tactics: On Glacial Ravine I like to use the Covenant and take advantage of the Scarab walking over cliffs and surprising the enemy with beams of death raining down from the hillside. Obviously, you can use any leader here but I prefer the Brute Chieftain for his Brute commandos. Using his brute commandos built from bases themselves allows me to use my building sockets to boom and get shield protection from air attacks. They also give me an infantry unit which I can use to garrison in the wall towers and hold the middle of the map for my team. | ||
If the other team takes control of the center wall towers upgrading the commandos to have jump packs allows me to move my forces over their walls and harass them while hopefully being able to jump back over to safety when they start to hunt my forces down. If my teammates haven’t crushed the enemy by this time I’m usually ready to get out an early Scarab. I usually don’t have much to support him but walking him over the center cliffs to surprise the enemy is very effective. Usually the entire enemy team scrambles to deal with my Scarab my teammates have free reign to attack other key locations. | If the other team takes control of the center wall towers upgrading the commandos to have jump packs allows me to move my forces over their walls and harass them while hopefully being able to jump back over to safety when they start to hunt my forces down. If my teammates haven’t crushed the enemy by this time I’m usually ready to get out an early Scarab. I usually don’t have much to support him but walking him over the center cliffs to surprise the enemy is very effective. Usually the entire enemy team scrambles to deal with my Scarab my teammates have free reign to attack other key locations. | ||
| Ligne 132 : | Ligne 136 : | ||
Fichier:HW-Memorial Basin (render 01).jpg|Memorial Basin | Fichier:HW-Memorial Basin (render 01).jpg|Memorial Basin | ||
</gallery> | </gallery> | ||
<toggledisplay showtext="Beasleys Plateau 2v2" hidetext="Réduire"> | |||
===<span style="color:#FF8000">'''Beasley's Plateau 2v2'''</span>=== | |||
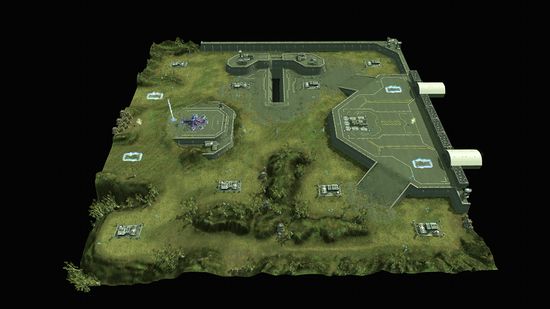
[[Fichier:HW-Beasley's Plateau (render 01).jpg|550px|center|thumb]] | |||
<span style="color:#FF8000">'''Programmer Notes'''</span> | |||
Chris Stark, Programmer on Halo Wars, talks about his strategies on Beasley's Plateau. | |||
Beasley’s Plateau is probably one of my favorite 2v2 maps. The wide open space gives me plenty of room to maneuver and sneak my army up next to the enemy base before they realize I’m coming. One of my favorite tricks on Beasley’s is to use my scout and a couple of friends to sneak over and grab unused sockets at the start of the game. It’s a great way to get my econ boosted, or start cranking out troops right next to the enemy. | |||
I always try to make sure to take out sockets on the way to the enemy base, that way it’s harder for the enemy to regroup. However, I also like to just attack the sockets with a few troops, and then move the bulk of my army around the other side of their base. As soon as they get their troops over to defend the sockets, I rush in and take out their base. | |||
[[Fichier:HW-Beasley's Plateau (render 02).jpg|350px|left|thumb]] | |||
<span style="color:#FF8000">'''Designer Notes'''</span> | |||
Justin Rouse, a skirmish map Designer, gives us one of his tactics: | |||
I like going with a Forge infantry rush on this map because of the extra building sockets near the starting bases. I quickly clear the rebels there and build 2 supply pads on the those sockets. The extra resources allows me to pump infantry and warthogs at the same time. I use this force to get over to the enemy’s free standing sockets since many players will build on them quickly and use the extra buildings to tech/boom faster. If I can take down these buildings I can usually put my opponent into a hole off the start. At that point, if I can keep the pressure on them they’ll begin to crumble. | |||
The other notable thing to do on Beasley’s is to get the Life Support hook in the center. The mistake a lot of people make is they go for this too early in the game. This hook is extremely powerful (+20~25% to total max pop with reinforcements upgraded) but its power will go unused if you acquire this hook before you’re ready to use the population space. You should always wait until you’re near pop cap before fighting the tough rebels at this location, but even if you can’t make use of the pop room its still a good idea to make sure you’re in control of it and not your enemy. | |||
[[Fichier:HW-Beasley's Plateau (render 03).jpg|650px|center|thumb]] | |||
</toggledisplay> | |||
Version du 9 février 2018 à 13:59
Official Halo Wars Community Site (halowars.com)
Game Info
Overview
-"If they want war, we'll give 'em war."
The Game
Halo Wars is a real-time action strategy game for the Xbox 360 that allows the player to control large armies and to shrewdly direct them in realistic warfare. Set early in the iconic war between the Covenant and UNSC - made famous by the Halo FPS games - Halo Wars provides a new angle on the war while bringing new heroes to the battle.
In Halo Wars fans will be able to control armies of units that are familiar to them from the FPS games, such as UNSC Marines, Scorpion Tanks, and the iconic Warthog. Our E3 demo video gives a narrated first look at the game, and you can download it from our movies page.
The Controls
We've spent a great deal of time simply on getting the controls right. Halo Wars was created for the Xbox 360 from the ground up, which meant we didn't have to make compromises or shoe-horn in artifacts from a Windows PC game. We were able to take all the best aspects of RTS games, make them work perfectly on the Xbox 360, and exclude the rest.
The Developer
Halo Wars was developed by Ensemble Studios in Dallas, Texas. They were the developers behind the award winning Age of Empires series of real-time strategy games.
Halo Wars was released around the world on March 3rd, 2009. Please visit our FAQ page for answers to common questions.
Skirmish Maps
Here you'll find information about all of Halo Wars' Skirmish Maps. If the thumbnail is clickable, it will take you to a page about that map.
On each page you'll find snippets about the map from designers and artists, as well as much larger images of the maps, and a Y-Axis shot allowing you to plan avenues of attack.
If a thumbnail isn't clickable yet, check back in the future, as we'll be rolling them out as time goes by.
3v3 Maps
<toggledisplay showtext="Exile 3v3" hidetext="Réduire">
Exile 3v3
Artist Notes
Paul Slusser, an Artist who worked on Exile tells us a bit about his work on the map.
Exile was one of the maps we created toward the end of the development cycle, so we pretty much knew going into it what kind of things to avoid.Since 3v3 maps are our worst performance maps, due to the amount of units it could have on screen at any given time, we knew this maps had to be pretty simplistic. Minimal use of terrain objects/vegetation and no water/lava, which actually worked out nicely since the setting was to represent a lifeless, dried up planet.
One of the hardest parts of creating Exile had to be alignment of the terrain to the bordering Forerunner structure along the outer edges. I had originally planned on using a very large masking technique to handle this, but after a few attempts I realized that was not going to work for something that needed this type of pixel perfect alignment. So I had to slowly sculpt and blend the terrain by hand all the way around one of our largest maps. My favorite tactic on this map was to gain control over the free reactors and always get my team to hit the player on the outer most ring first. I found that the players that got placed in the middle where always planning for incoming attacks and would hesitate sending their forces away from their base to support allies.
Designer Notes
Justin Rouse, a skirmish map Designer, gives us one of his tactics:
Tactics: On exile I tend to let my start placement dictate my strategy more so than other maps. If I’m the center start position I like to rush hard and force the opposing center start player to call for help, keeping his teammates from doing what they want. If I’m either of the other two start locations I tend to go for an all out boom to tech’d up air units hoping our center position teammate can hold out while I try to get there.
Exile was originally called “Bowl_3_SWE” during the majority of development, so I always have to think twice what people are talking about when they say Exile.
</toggledisplay>
<toggledisplay showtext="Fort Deen - 3v3" hidetext="Réduire">
Fort Deen - 3v3
Designer Notes
Fort Deen went through some iterations on gameplay because we wanted this map to feel like each player was pretty safe from the rush. Originally we only had one player per team start in the elevated “safer” areas with his two teammates starting on the outskirts. With the long distance from one side to the other on this map it was still easy enough for two players on one team to rush down the side of the map and hit the edge player with enough time to do serious damage before the edge player’s teammates could react and send help, very much like Frozen Valley and we wanted something different. The simple change of moving the starting locations for all three players up the ledge really helped achieve this. To reinforce this goal we put wall hooks and creep groups down the side paths to help hinder the early rush.
Justin Rouse, Multiplayer Map Designer, gives us one of his tactics:
Tactics: On this map I love to use Brute commando squads. Since they’re infantry I can put them into the wall towers and block off my enemies ground forces but because of my brute jump packs I can jump back and forth over the walls to get away from danger or to closer to juicy targets coming to shoot my units out of the towers. Once my team has the upper hand it can still be very difficult to crack the enemy team’s starting base location since they’re in close proximity to each other up on the ledges. While the enemy has their forces at one of the two choke points trying to stop my teammates tank/air combo and my brute chief from storming in, I like to walk my army of brute commandos up to the front wall in the center, where they usually only have missile towers for air to come over, and jumppack my brutes into the back of their base. When they figure out what I’m doing and send some troops over to stop me I jump my brutes back down and run away and repeat the process once they move back to the front.
</toggledisplay>
<toggledisplay showtext="Frozen Valley 3v3" hidetext="Réduire">
Frozen Valley 3v3
Designer Notes
Justin Rouse, a skirmish map designer, dishes out some info on Frozen Valley: Frozen Valley was the first 3v3 map designed during the development of Halo Wars. After Chasms, this was probably our most played map through internal playtesting. The layout went through one major tweak throughout development and that was the opening down between the teams that runs along the bottom edge on picture shown here. The first iteration had the hole as well as the mount near that bottom edge of the map extend all the way to the edge. Leaving a pocket only access through the middle by land units. It allowed the two bottom player on each team to build up safely.
As map “hooks” came online I wanted them to be easily attacked from different angles and only having 2 paths between teams was making this too difficult. Once the bottom side path was opened leaving a “3-way” go between the teams, along with the hooks placed on the map, more strategic options became available and the map became extremely fun. Before, it was just a fairly straight forward map.
Designer Notes
Duncan Stanley, Community Manger for Robot, talks about Frozen Valley:
Frozen Valley was actually one of my least played maps during development. When it came to playtesting, I was usually available for the 1v1 and 2v2 playtest sessions (where I'd throw down with Thunder), so I rarely got to play Frozen Valley. Nonetheless, my incessant whining about the OPness of the Warthog got it toned down (yes, you read that right) before launch. Warthogs during development were almost immune to infantry up until RPGs entered the equation.
But on to Tactics! Your strategy for the game usually depends on if you're in the pocket (the middle) of your side or not. If you are, it's usually safe for you to boom and go for higher-tech units, possible swooping in to save the day at the last minute. If you're on either of the sides, you're usually in the thick of it with your opponents across the way fairly quickly over the expansions. As always, trying to grab your opponents nearest base is a good tactic to throwing their game off, if a bit risky.
Also, all the extra bases around the map mean that if you can protect them, you can get a ton of resources and build up armies very quickly. Personally, I like to go air if I'm Anders, or Tanks if I'm Forge on this map, they seem to cover the distance very quickly and can usually survive long enough for you to accomplish your goals with them.
</toggledisplay>
<toggledisplay showtext="Glacial Ravine 3v3" hidetext="Réduire">
Glacial Ravine 3v3
Designer Notes
Justin Rouse, a skirmish map Designer, talks about Glacial Ravine
Originally, our DLC2 pack (Historic Battles) was intended to contain only 3 maps: Barrens, Blood River, and Memorial Basin. After seeing the outcry for more 3v3 maps we took a look at what it would take to get one into the Pack. We did some due diligence and realized we didn’t have the time to create a new 3v3 from scratch, get it through testing, and put it into the map pack. So we compromised by repurposing an existing map, which allowed us to reduce developer time enough to get Glacial Ravine out the door with the others. We decided on using Frozen Valley as our base map because the majority of the bases were on the outer edge of the map which left us with a lot of central area to manipulate for game play rather than worrying about meeting our base requirement needs. Since this map was very open, and all of our 3v3’s had multi routes to the enemy we decided to go with a more focused front and funnel everyone through the middle. Adding in the wall towers allows players to control the “line” between them and their enemies easier than any of the other 3v3’s. With large scale battles happing in 1 place, this seemed like a perfect map to add the Sentinel Factory to giving everyone access to the Super Sentinel to be a stunning menace to large armies moving through the middle pass. There is only 1 free floating base location on each side of the map now so teams will have to strategize for which player gets the extra/3rd base location, also making the creeps at this location a bit tougher slows players from taking it just a tad.
Multiplayer Tactics
Tactics: On Glacial Ravine I like to use the Covenant and take advantage of the Scarab walking over cliffs and surprising the enemy with beams of death raining down from the hillside. Obviously, you can use any leader here but I prefer the Brute Chieftain for his Brute commandos. Using his brute commandos built from bases themselves allows me to use my building sockets to boom and get shield protection from air attacks. They also give me an infantry unit which I can use to garrison in the wall towers and hold the middle of the map for my team. If the other team takes control of the center wall towers upgrading the commandos to have jump packs allows me to move my forces over their walls and harass them while hopefully being able to jump back over to safety when they start to hunt my forces down. If my teammates haven’t crushed the enemy by this time I’m usually ready to get out an early Scarab. I usually don’t have much to support him but walking him over the center cliffs to surprise the enemy is very effective. Usually the entire enemy team scrambles to deal with my Scarab my teammates have free reign to attack other key locations.
</toggledisplay>
2v2 Maps
<toggledisplay showtext="Beasleys Plateau 2v2" hidetext="Réduire">
Beasley's Plateau 2v2
Programmer Notes
Chris Stark, Programmer on Halo Wars, talks about his strategies on Beasley's Plateau.
Beasley’s Plateau is probably one of my favorite 2v2 maps. The wide open space gives me plenty of room to maneuver and sneak my army up next to the enemy base before they realize I’m coming. One of my favorite tricks on Beasley’s is to use my scout and a couple of friends to sneak over and grab unused sockets at the start of the game. It’s a great way to get my econ boosted, or start cranking out troops right next to the enemy.
I always try to make sure to take out sockets on the way to the enemy base, that way it’s harder for the enemy to regroup. However, I also like to just attack the sockets with a few troops, and then move the bulk of my army around the other side of their base. As soon as they get their troops over to defend the sockets, I rush in and take out their base.
Designer Notes
Justin Rouse, a skirmish map Designer, gives us one of his tactics:
I like going with a Forge infantry rush on this map because of the extra building sockets near the starting bases. I quickly clear the rebels there and build 2 supply pads on the those sockets. The extra resources allows me to pump infantry and warthogs at the same time. I use this force to get over to the enemy’s free standing sockets since many players will build on them quickly and use the extra buildings to tech/boom faster. If I can take down these buildings I can usually put my opponent into a hole off the start. At that point, if I can keep the pressure on them they’ll begin to crumble.
The other notable thing to do on Beasley’s is to get the Life Support hook in the center. The mistake a lot of people make is they go for this too early in the game. This hook is extremely powerful (+20~25% to total max pop with reinforcements upgraded) but its power will go unused if you acquire this hook before you’re ready to use the population space. You should always wait until you’re near pop cap before fighting the tough rebels at this location, but even if you can’t make use of the pop room its still a good idea to make sure you’re in control of it and not your enemy.
</toggledisplay>
1v1 Maps


